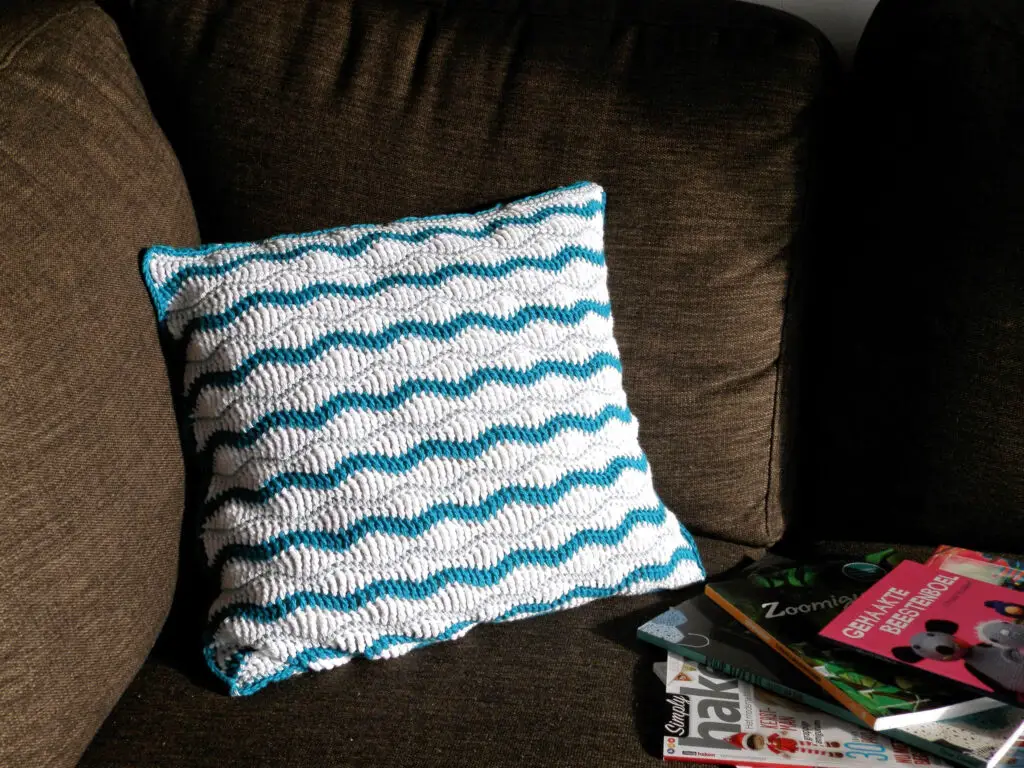
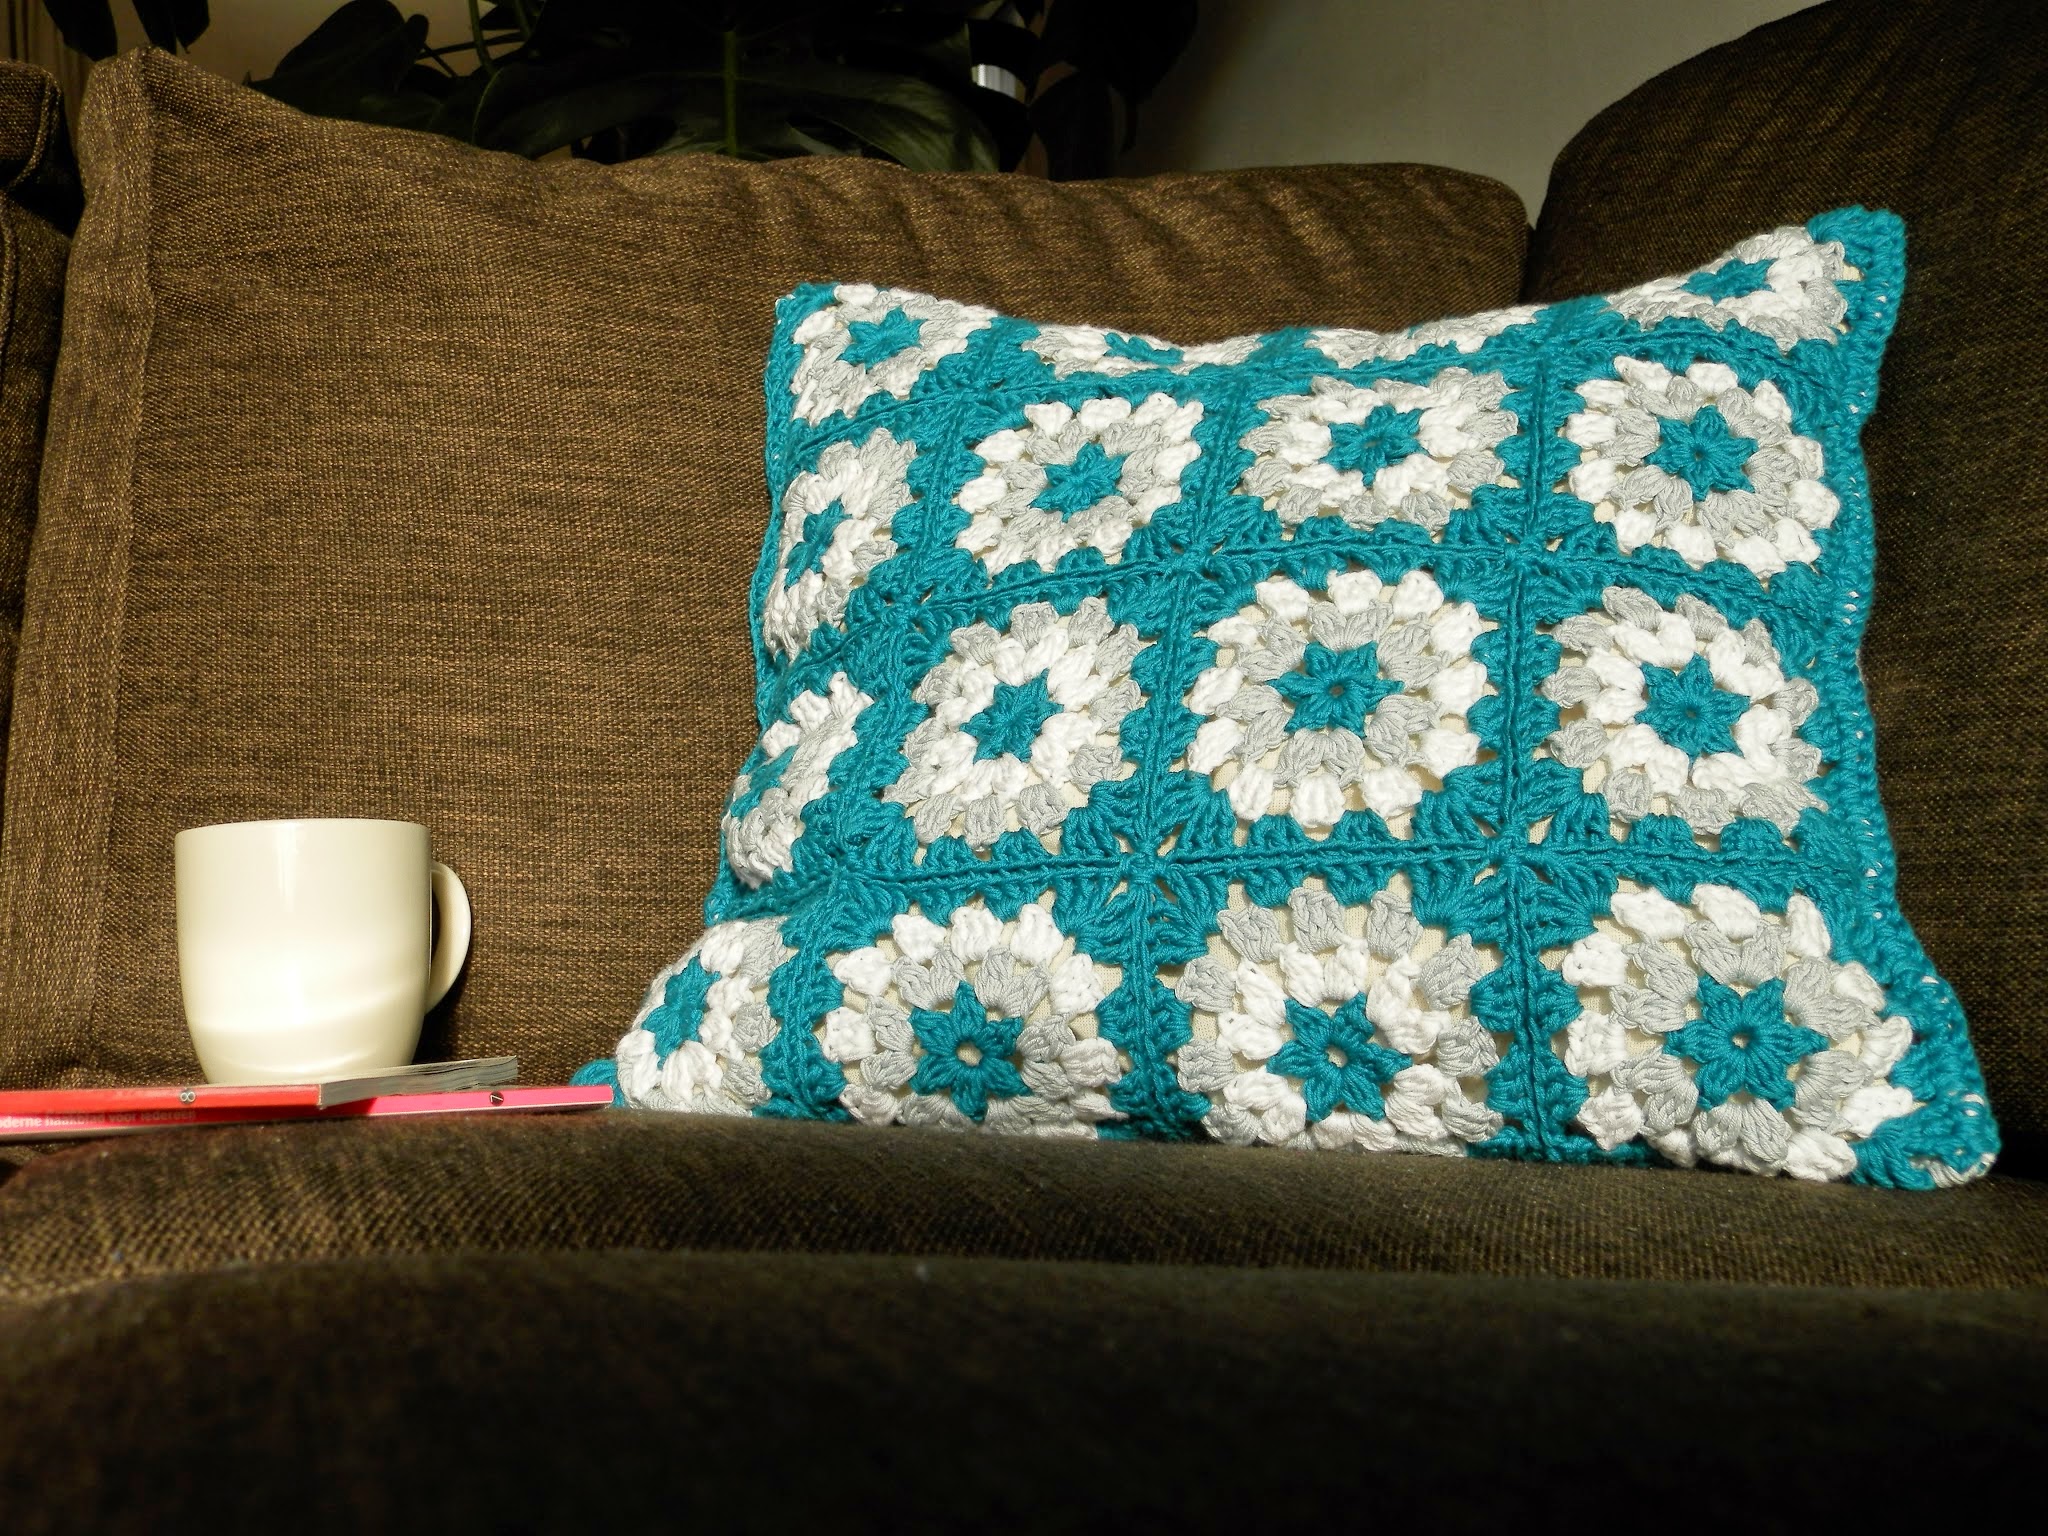
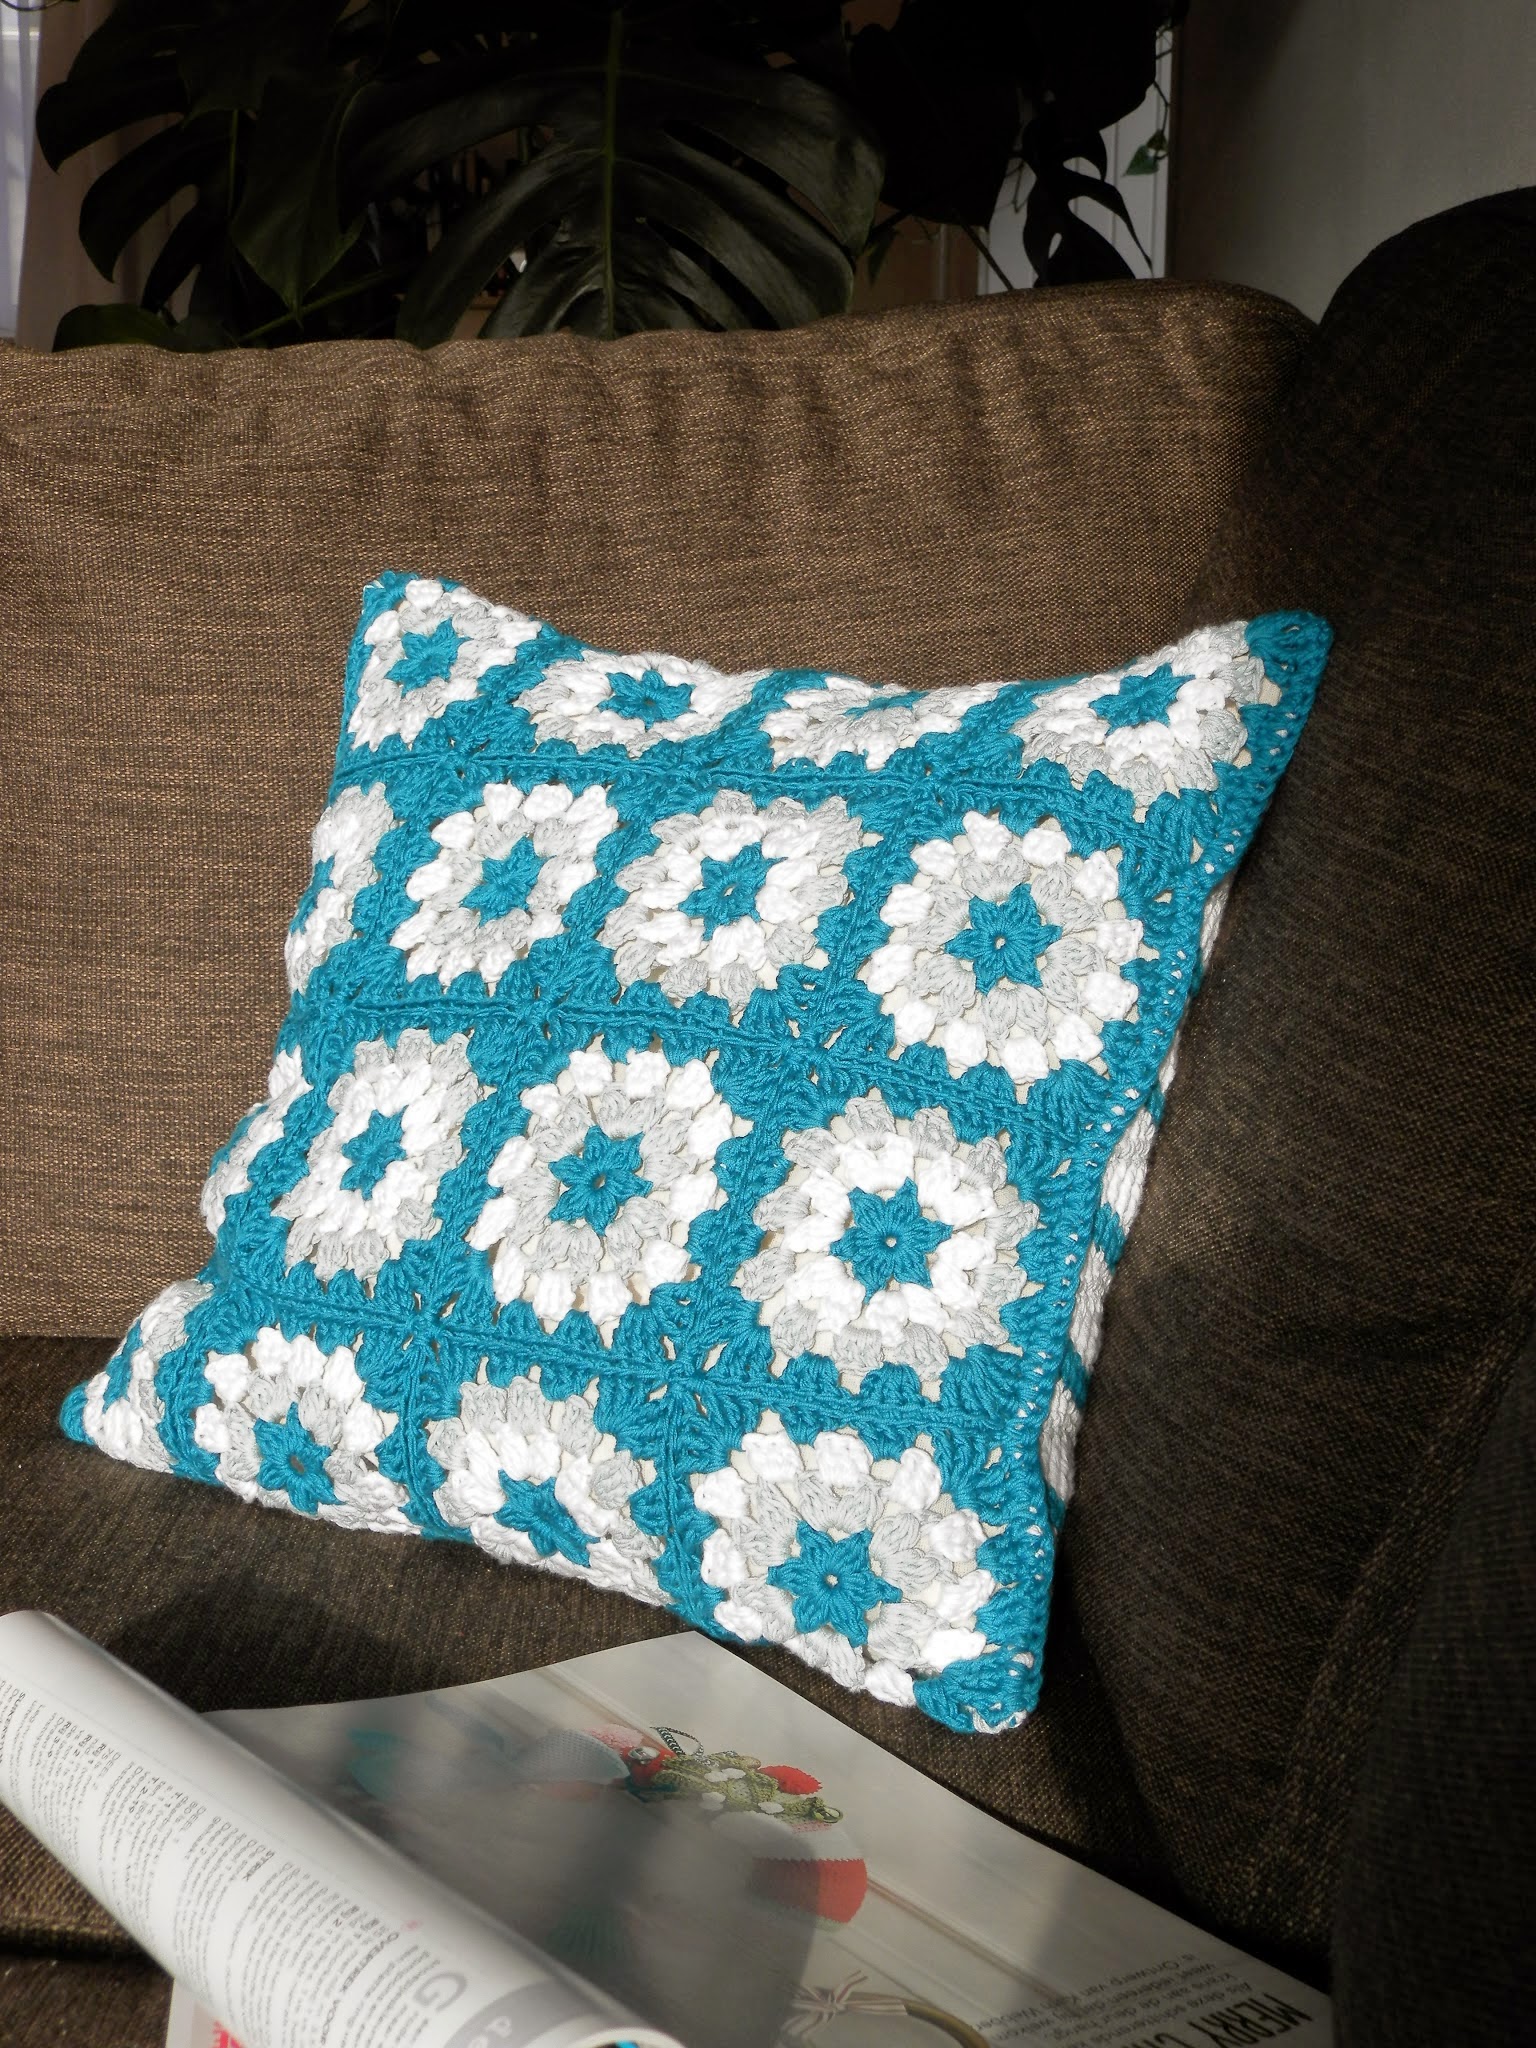
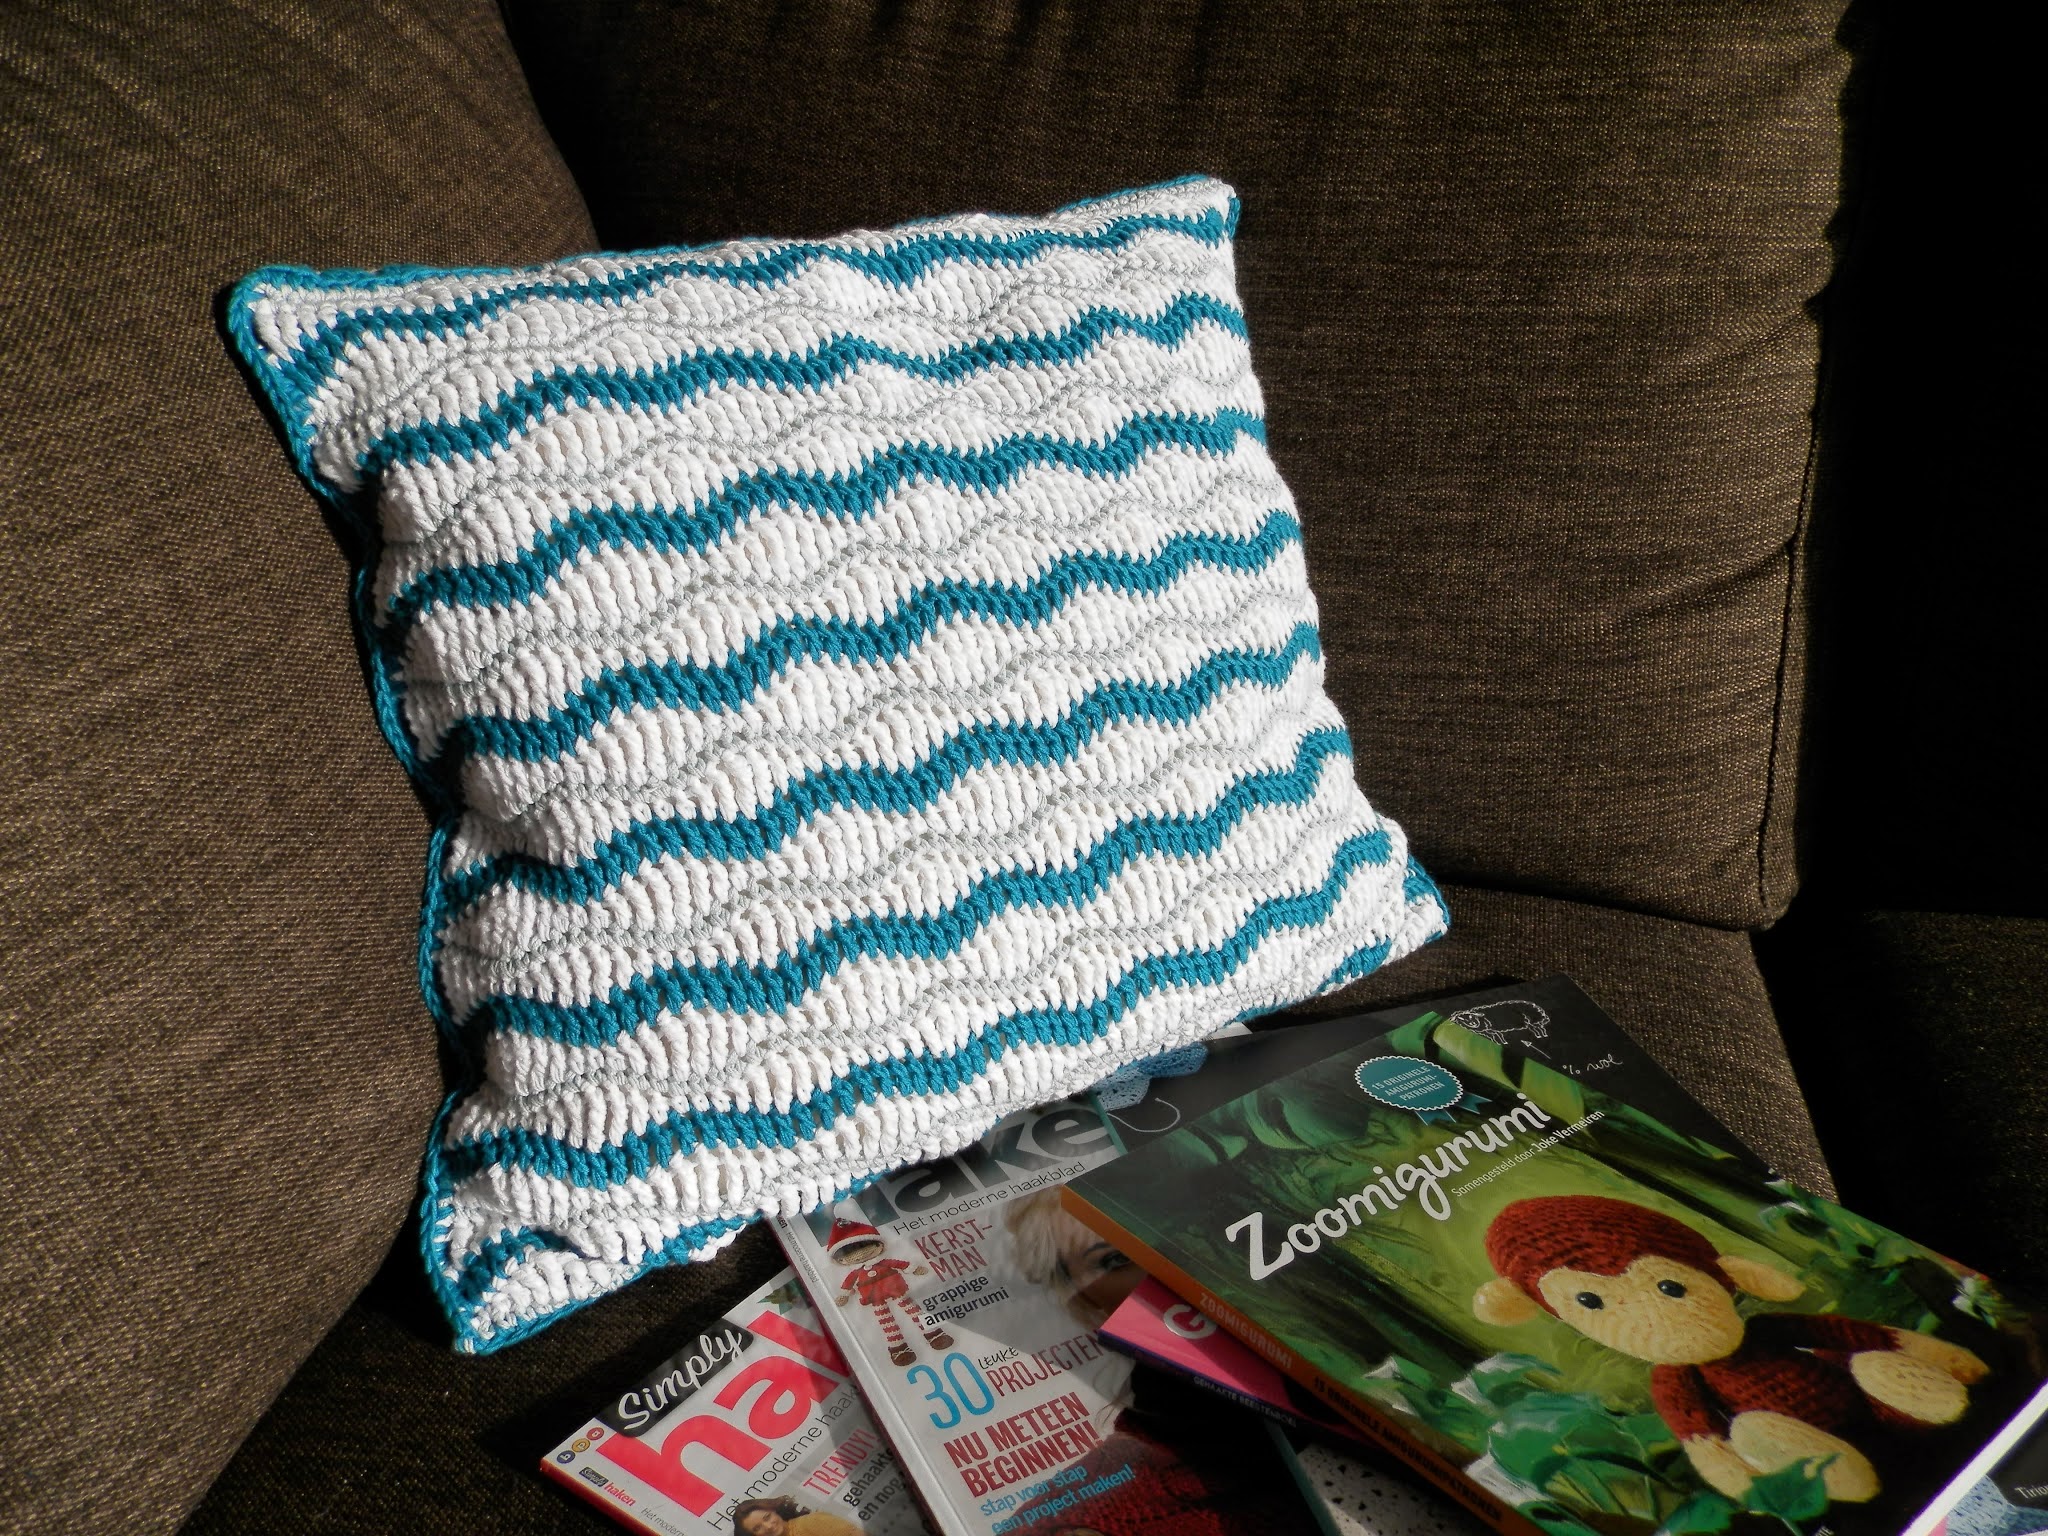
The Blue Lagoon cushion has two sides, both nice enough to call the front, which means it’s truly double sided. One side has 16 granny squares and the other side has flowing waves. The original uses bright blue and grey shades, which gives the cushion a watery feel to it.
Resources
- Blue Lagoon Cushion pattern on Ravelry
- Buy PDF on Ravelry
- **Video tutorials** in one Playlist on YouTube
- Drops Safran yarn
Materials
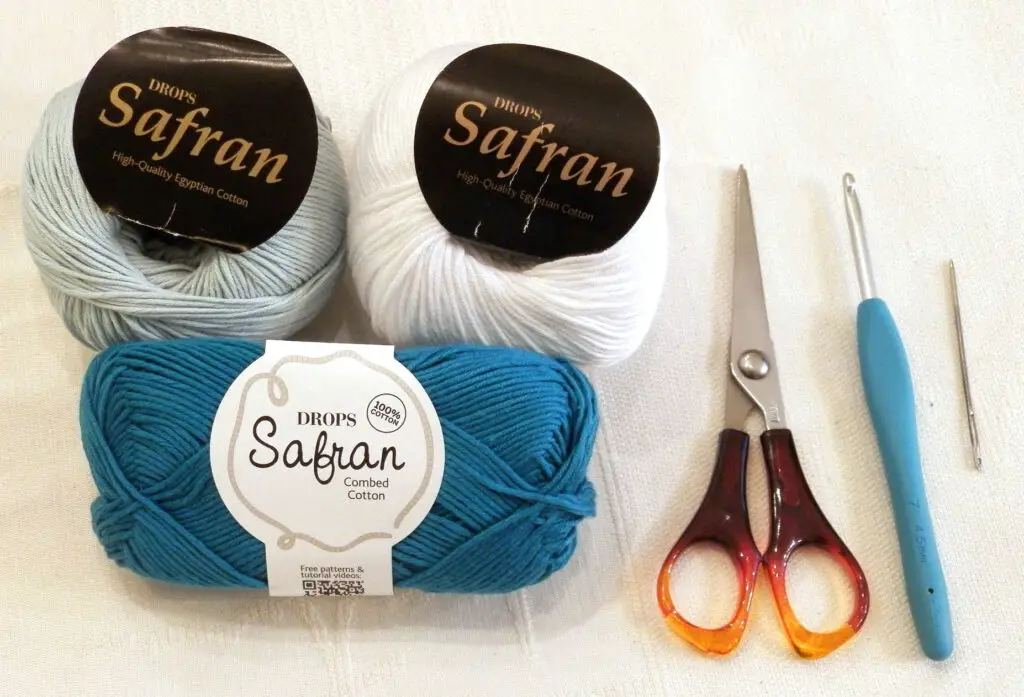
- 4 x Drops Safran Petrol (51) (50g/160m, 100% cotton) – yarn A
- 2 x Drops Safran Mint (50) (50g/160m, 100% cotton) – yarn B
- 2 x Drops Safran White (17) (50g/160m, 100% cotton) – yarn C
- 4.5mm crochet hook (UK 7 / US G-7)
- 45cm x 45cm inner cushion
Abbreviations
This pattern uses US crochet terminology. See THIS POST for a conversion to UK terms.
ch chain stitch
ch-sp chain space
dc double crochet
dtr double treble crochet
hdc half double crochet
sc single crochet
ss slip stitch
tr treble crochet
yo yarn over hook
beg-cl beginning cluster. Ch2, yo and draw up a loop (3 loops on hook), yo and take off 2 loops (2 loops on hook), yo and draw yo a loop (4 loops on hook), yo and take of 2 loops (3 loops on hook), yo and draw through all 3 loops on hook
cl cluster. Worked like a dc3tog but worked in one stitch. (Yo and draw up a loop, yo and take off 2 loops) 3 times, yo and draw through all loops on hook
Blue Lagoon Cushion – Free Crochet Pattern
Squares
Use the yarn double stranded to make 16 identical squares.
Round 1 With yarn A, ch5, ss in first ch to form a ring, beg-cl in ring, ch3, (cl, ch3) in ring 5 times, close with a ss in beg-cl. Fasten off. [6 cl, 6 ch3-sp]
Round 2 Attach yarn B (or C) in any ch3-sp with ss, (beg-cl, ch3, cl) in ch3-sp ch3. *(cl, ch3, cl) in next ch3-sp, repeat from * to end, close with a ss in beg-cl. Fasten off. [12 cl, 12 ch3-sp]
Round 3 Attach yarn C (or B) in any ch3-sp with ss, ch3 (counts as 1dc here and further), 2dc in same ch3-sp, ch2. *3dc in next ch3-sp, ch2; repeat from * to end, close with ss in first st. Fasten off. [36 dc, 12 ch2-sp]
Round 4 Attach yarn A in any ch2-sp with ss, ch3, 2dc in same ch2-sp, ch1, *(3tr, ch2, 3tr) in next ch2-sp, ch1, 3dc in next ch2-sp, ch1, 3dc in next ch2-space, ch1; repeat from * to end omitting final 3 dc, close with ss in first st. Fasten off. [24 tr, 24 dc, 4 ch2-sp, 12 ch1-sp]
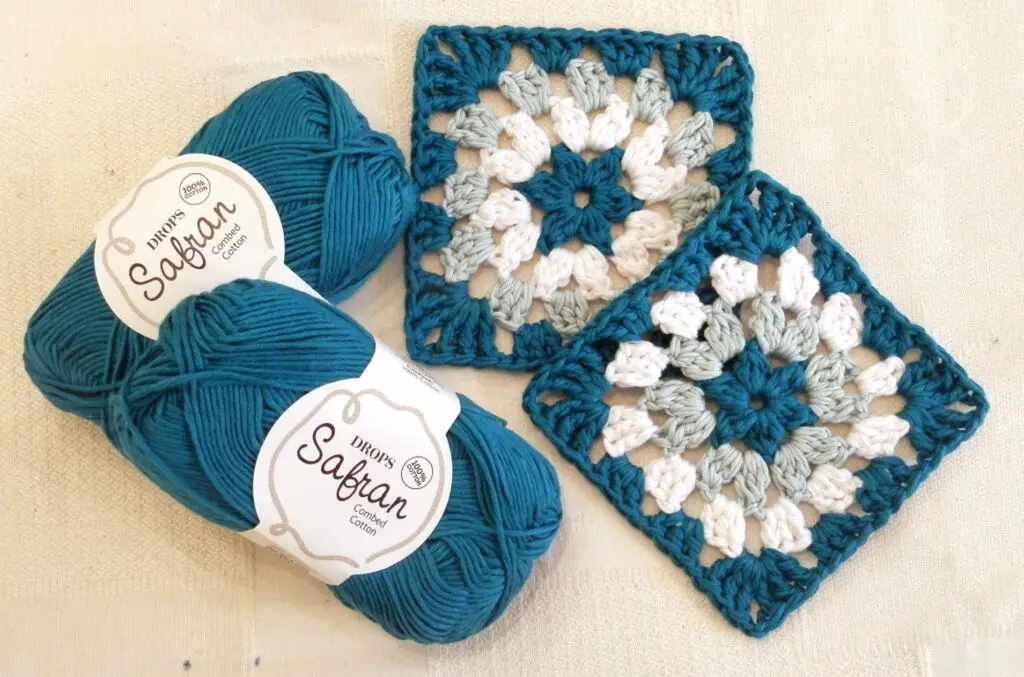
Make 16 squares, in two different color combinations. Make 8 squares in Combination 1: A – B – C – A, and 8 squares in Combination 2: A – C – B – A. After blocking your squares measure about 11cm.
In the video below you can find how to make the squares.
Joining the squares
Connect your squares alternating in 4 rows and 4 columns using yarn A double stranded.
- Combination 1 – Combination 2 – Combination 1 – Combination 2
- Combination 2 – Combination 1 – Combination 2 – Combination 1
- Combination 1 – Combination 2 – Combination 1 – Combination 2
- Combination 2 – Combination 1 – Combination 2 – Combination 1
Place two squares with the right sides facing each other. Insert your hook from front to back through the ch2 space in the right hand corner of both squares and make 1sc. Insert your hook through the outer loops of both squares and make 1sc. Repeat by making 1sc through the outer loops of both squares, until you reach the corner. In the left corner insert your hook from front to back through the ch2 space of both squares and make 1sc.
Take 2 more squares and place them right sides facing each other and insert your hook from front to back through the ch2 space in the right hand corner of both squares and make 1sc. Repeat like you did on the first two squares and connect. Repeat two more times to make 2 horizontal rows containing 4 squares.
Repeat with the next row until you have 4 horizontal rows of 4 squares each. Turn the cushion and work the vertical rows in the same way.
I have made an instruction video for joining the grannys.
Wave side
Work all rows from right to left and do not turn your work. Start the wave side by making a sc in the back loops of the squares on one edge of the joined squares using yarn A or B. This way the two sides of the cushion will fit together perfectly. Don’t stress about the number of stitches you have. Just keep working to the end of the row in each row. The waves are made by repeating the following 4 rows.
Row 0 Attach yarn A in first st with ss, ch1 (does not count as a st here and further), 1sc in each st or space across. Fasten off.
Row 1 Attach yarn C in first st with ss, ch1, *1sc, 1hdc, 1dc, 1tr, 1dtr in next 2 sts, 1tr, 1dc, 1hdc; repeat from * to end. Fasten off.
Row 2 Attach yarn A in first st with ss, ch1, 1dc in each st to end. Fasten off.
Row 3 Attach yarn C in first st with ss, ch1, *1dtr, 1tr, 1dc, 1hdc, 1sc in next 2 sts, 1hdc, 1dc, 1tr*, repeat from * to end. Fasten off.
Row 4 Attach yarn B in first st with ss, ch1, 1dc in each st to end. Fasten off.
Repeat rows 1 to 4 another 7 more times. This gives 8 waves in color A and 7 waves in color B.
Off course I have made an instruction video showing how to make the waves. 🙂
It is essential to block the wave side of the cushion to stretch it to the same size as the granny side of the cushion. If you don’t block it, it will most likely not fit.
Inner cushion
I always make my own inner cushions. This way I have them the exact size I want them and in the right color. I chose to make an inner using ecru fabric. A light blue, cream or even black inner would also work well. Make sure it is a color that complements the colors of the cushion and will do justice to it.
Make an inner cushion by stitching two pieces of fabric together with the right sides of the fabric facing each other. First stitch two of the three edges. Turn the cushion right side out and fill it with filling. Close the fourth edge of the cushion. The completed inner should measure about 45cm x 45cm.
Finishing the cushion
Connect two of the remaining three sides of the cushion with single crochets using two threads of yarn A. Insert the inner cushion and close the final side with single crochets. The end result is a bright, chunky and fun cushion measuring 45cm x 45cm.
Support me and my work
There are many ways that you can support me and my work and most of them are free. By visiting my website you are already supporting me! Also by viewing any of the free videos on my YouTube channel you support me.
Other ways to support me are to make a purchase from one of my affiliates. I get a small commission based on your purchase after you click one of the links on my website. It costs you absolutely nothing but helps me a lot. My affiliates are Amazon.co.uk, KnitPicks, Wool Warehouse, Jimmy Beans Wool, Minerva Craft, The Knitting Network, Love Crafts, and Caro’s Atelier.
If you would like to support me in ways that are out of pocket for you, you could buy any of my patterns on Ravelry or my SHOP. You can also make a DONATION, which I really appreciate. Even a small amount helps me to keep my small business running.
#itsallinanutshell
If you are making something with one of my patterns or one of my videos, I would love to see your work. Use the hashtag #itsallinanutshell on Instagram to help me find it, share your work in my It’s all in a Nutshell Crochet Nuts group on Facebook or tag me in one of your posts.
With love,
Esther
Follow me on
Facebook, YouTube, Ravelry, Instagram
This post contains affiliate links. Please read my disclosure and copyright policy. All opinions are my own and I only link to products I use or would use. Thank you for using the links on my blog and supporting my work.
Copyright (c) 2014-2025 It’s all in a Nutshell Creations. All rights reserved.
Discover more from It's all in a Nutshell Crochet
Subscribe to get the latest posts sent to your email.


Just stunning! Love both sides too!
Your work is so inspiring! Thank you! Lynn
That is awesome! The gray adds such a subtle accent that really makes the wavy side pop.
Nice blog…look forward to visiting again!