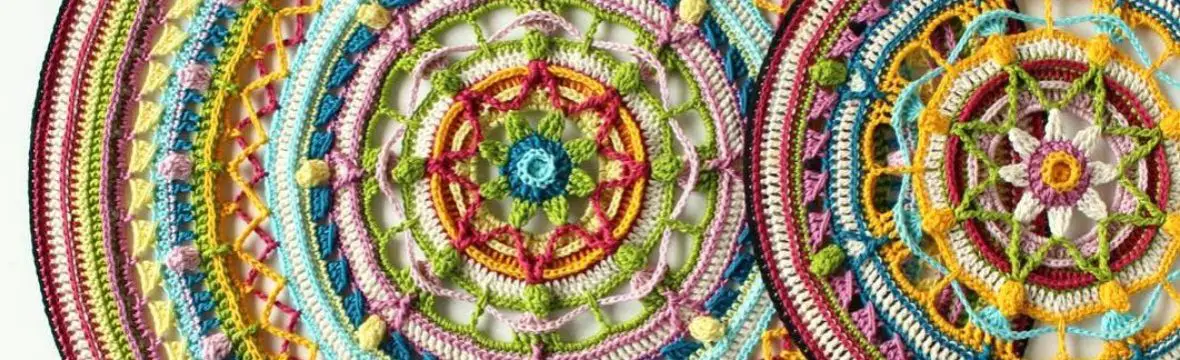

The Scheepjes Hygge CAL, a unique design that combines embroidery and crochet to make a luxurious wrap. The wrap has been designed by Kirsten from Haak Maar Raak. With this post I want to give you all the information regarding Hygge CAL and show you my completed wrap.
Resources
- Add this free pattern to your Ravelry library
- General Information & written patterns – English
- General Information & written patterns – Dutch
- English Facebook group
- Dutch Facebook group
- Yarn kits
Video resources
- YouTube Playlist with all English (UK Terms) videos – right handed
- YouTube Playlist with all English (UK Terms) videos – left handed
- YouTube Playlist met alle Nederlandse video’s – reghtshandig
- YouTube Playlist met alle Nederlandse video’s – linkshandig

Yarn Packs
Hygge kits are/were available in 5 colorways. The kits contain 10 balls of Stone Washed yarn, 11 balls of Catona yarn and extra goodies which include a button, a charm, a stitch marker, a yarn needle and 2 wooden ice crystals.
You can buy Scheepjes Stone Washed from Amazon.co.uk (UK), Wool Warehouse (UK), Jimmy Bean Wools (USA), Love Crafts (USA), The Knitting Network (UK), Caro’s Atelier (NL/EU), or your local Scheepjes Stockist.
Scheepjes Catona is available from Amazon.co.uk, Wool Warehouse (UK), Jimmy Beans Wool (USA), The Knitting Network (UK), Love Crafts (USA / UK), Caro’s Atelier (NL / EU), and many other Scheepjes stockists.

Video tutorials
I have a short series of videos showing how to make the wrap. In part 1 I show how to make the first bobbles, in part 2 I show how to make the separator and do the embroidery, in part 12 I show the second series of bobbles, and in part 13 I show the border. In the description of the videos you can find the time stamps to each row/section so that you can jump ahead if you want to.
The videos are available in English and Dutch, with left and right handed versions in both languages. You can find them on my YouTube channel and the Scheepjes website. Please note that in the English video I use UK crochet terms. The videos will stay online indefinitely.
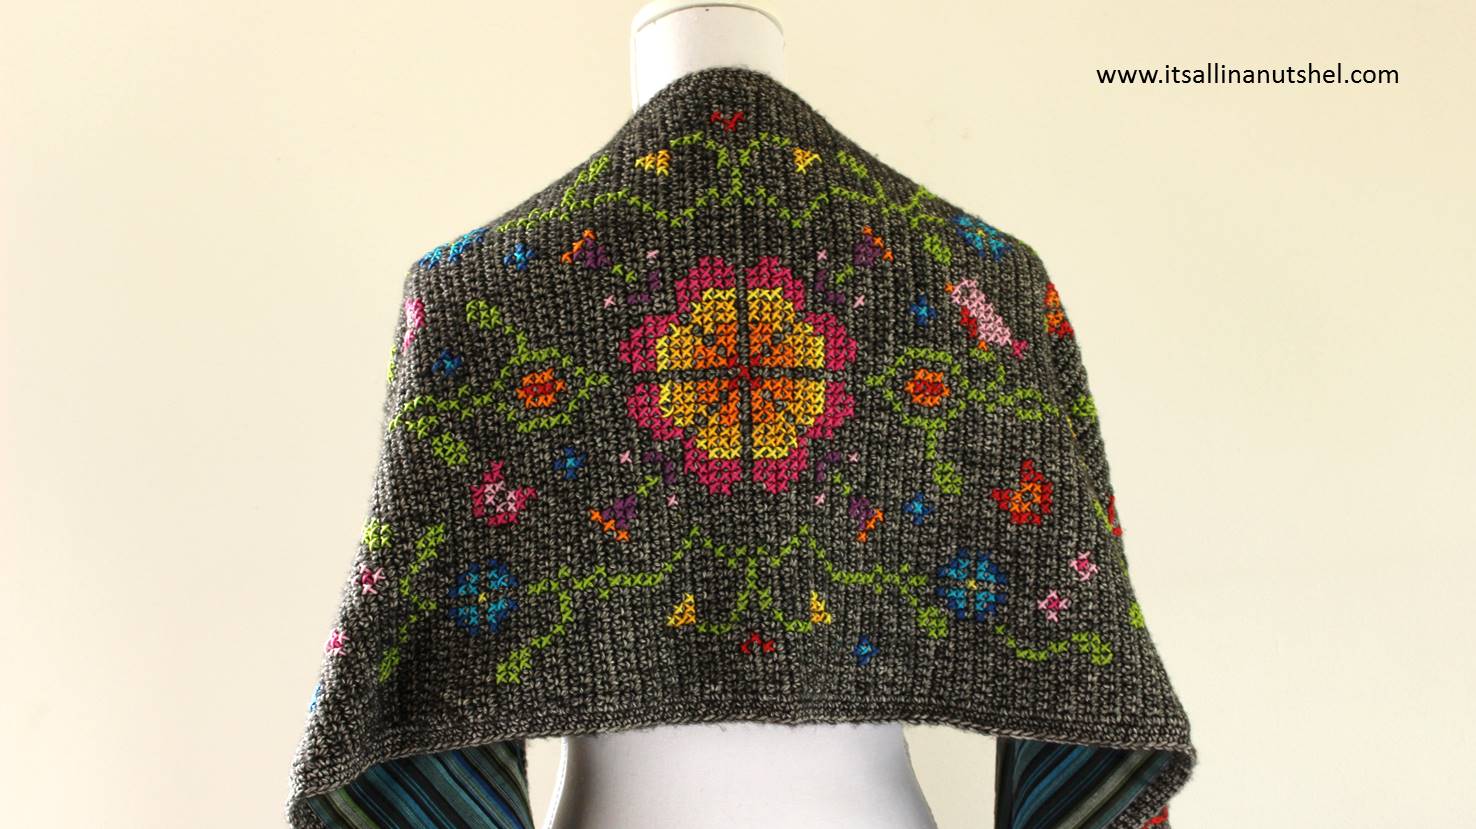
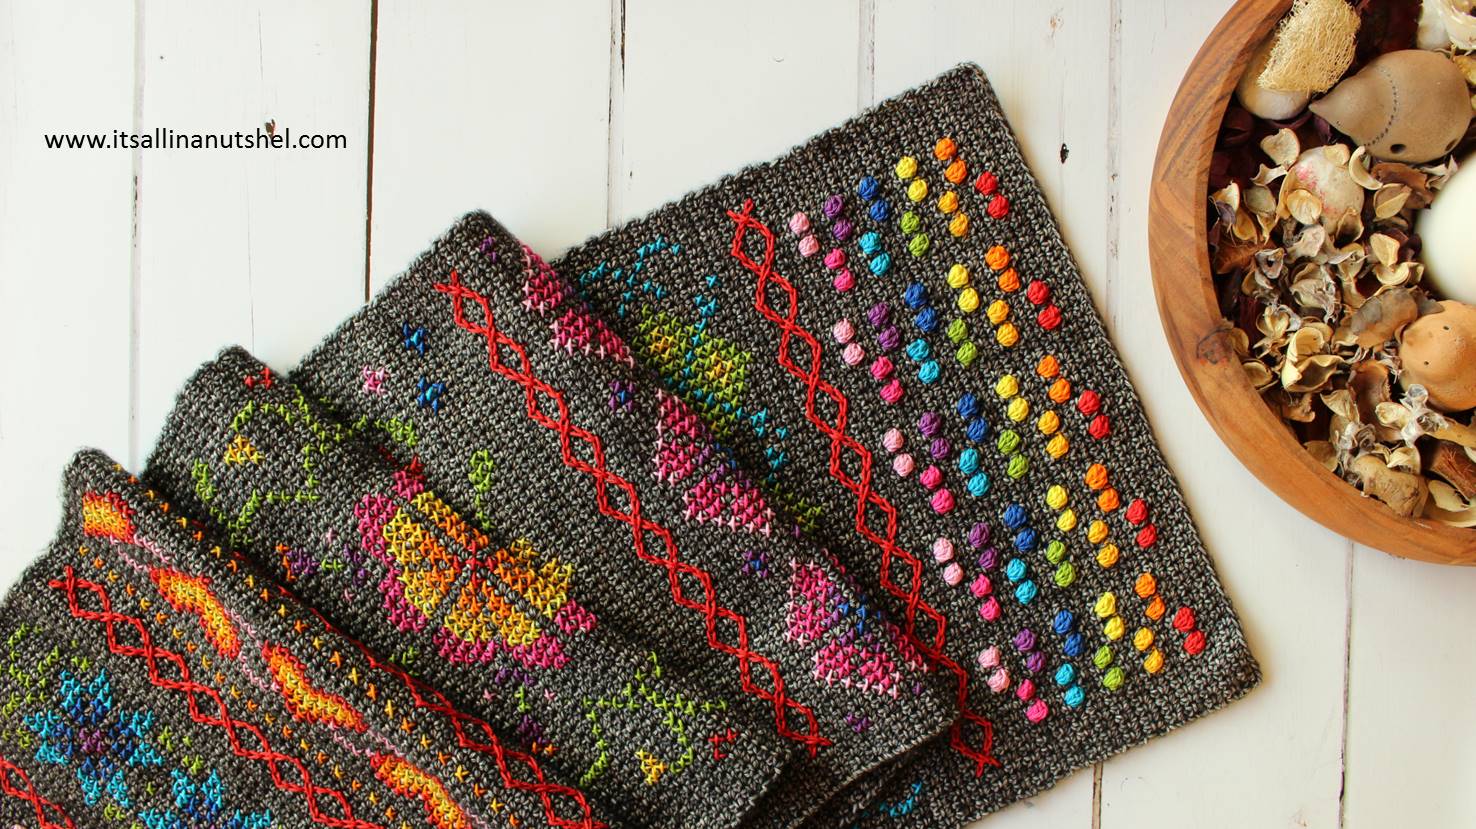
My Rainbow Wrap
I used the Rainbow kit to make the videos for you, and in the process make a beautiful wrap for myself.
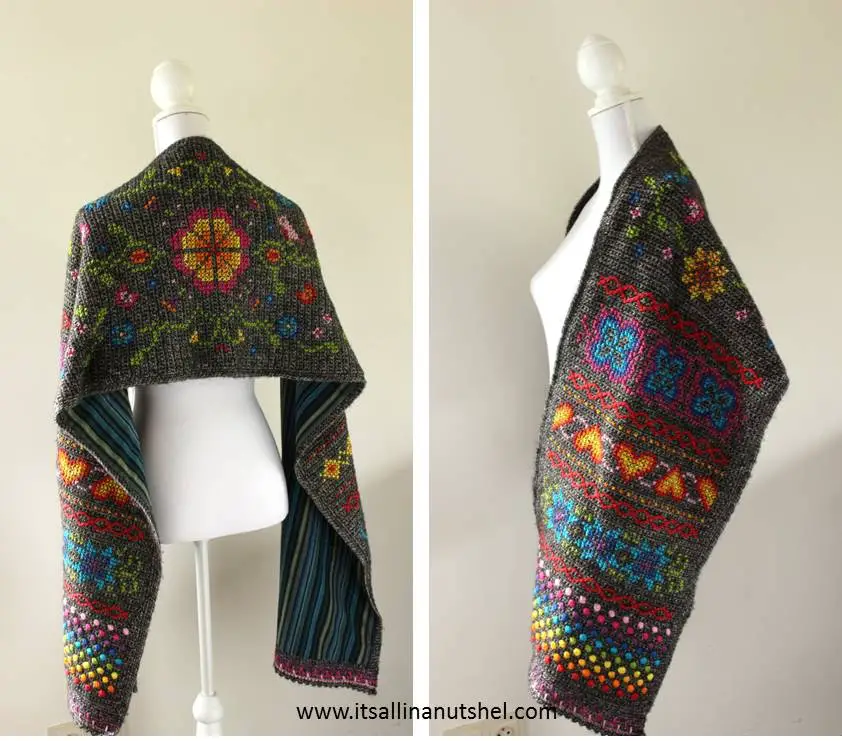
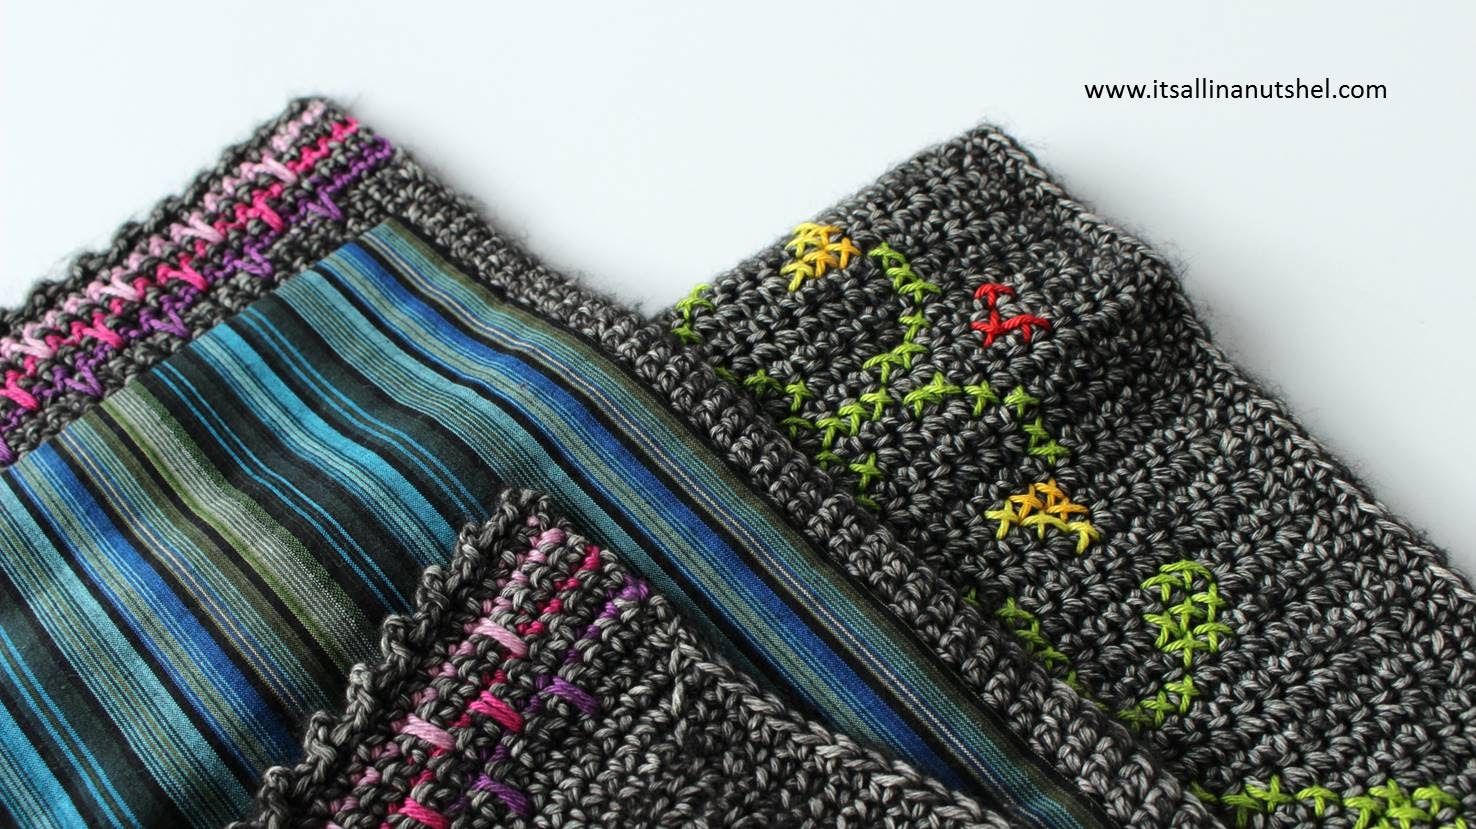
Last step was the lining; I used a fabric with blue and green stripes. I will be honest with you, this lining was a LOT of work, and I am sure that we can debate if it is really necessary. Nonetheless I lined my wrap and it gives a professional finish.
My Hygge Wrap
My wrap is thick, warm, cozy and everything you want from Hygge.

Support me and my work
There are many ways that you can support me and my work and most of them are free. By visiting my website you are already supporting me! Also by viewing any of the free videos on my YouTube channel you support me.
Other ways to support me are to make a purchase from one of my affiliates. I get a small commission based on your purchase after you click one of the links on my website. It costs you absolutely nothing but helps me a lot. My affiliates are Amazon.co.uk, KnitPicks, Wool Warehouse, Jimmy Beans Wool, Minerva Craft, The Knitting Network, Love Crafts, and Caro’s Atelier.
If you would like to support me in ways that are out of pocket for you, you could buy any of my patterns on Ravelry or my SHOP. You can also make a DONATION, which I really appreciate. Even a small amount helps me to keep my small business running.
#itsallinanutshell
If you are making something with one of my patterns or one of my videos, I would love to see your work. Use the hashtag #itsallinanutshell on Instagram to help me find it, share your work in my It’s all in a Nutshell Crochet Nuts group on Facebook or tag me in one of your posts.
I hope to see you again for a new project.
With love,
Esther
Follow me on
Facebook, YouTube, Ravelry, Instagram
This post contains affiliate links. Please read my disclosure and copyright policy. All opinions are my own and I only link to products I use or would use. Thank you for using the links on my blog and supporting my work.
Copyright (c) 2014-2026 It’s all in a Nutshell Creations. All rights reserved.
Discover more from It's all in a Nutshell Crochet
Subscribe to get the latest posts sent to your email.
Your rainbow wrap looks beautiful
Thank you 🙂
Thank you Esther. The Hygge is my thrid projet with you, Last dance on the beach and peacock tail bag. Now I will start NAS. Your videos are fantastic. Thanks +++++
Thank you 🙂
It looks so amazing! you did such a smashing job with this!
Thank you 🙂
Congratulations! It looks wonderful!
Thank you 🙂
Please can you tell me what the button and snowflakes and charm is for…..?
>
You can best ask the designer 🙂 She knows
I loved doing this CAL and your amazing tutorial vídeos. I still want to line mine and would love to do another project incorporating crochet and embroidery ???
Did you hand stitch the lining to the wrap?
yes, with teeny tiny stitches. It took me 3 days to sew it on. The result is amazing, you don’t see the stitches at all
I like to line all my purses and they always turn out so nice but…. I dread the hand stitching. Uuugg! Your wrap is beautiful. But I absolutely love your squares. Love love love them. Thank you for sharing.
Hi, was wondering if you might consider making a tutorial on lining the shawl?
There will not be a tutorial for the lining. Please see the detailed written instructions.