
You have cast on your stitches and all set to go. The next step in working a toe-up sock is the toe. This requires increasing your stitches to the final stitch count that you will maintain for the rest of the sock. There are several ways to work increases, but I prefer the method with m1l and m1r. In the video tutorial I show you how to make these stitches and how to work in the round.

Resources
- “Happy Toe-up Socks” overview on It’s All in a Nutshell website
- “Happy Toe-up Socks” full written pattern PDF
- Sock yarn
Overview of materials needed for knitting socks
I use the following materials in the video tutorials
- Scheepjes Our Tribe Olive Wreath (879)
- Scheepjes Our Tribe Marie (962)
- 2.5mm circular needles with 75cm cable
- 2.5mm Double Pointed Needles (DPNs) length 15cm
- stitch markers & darning needle
Scheepjes Our Tribe is available from Wool Warehouse (UK/Int), Love Crafts (USA), Caro’s Atelier (NL/EU) or your favorite Scheepjes Stockist.
Video Tutorial
In the toe video tutorial I show you how to increase the stitches in a way that looks natural and gives a pretty edge on the side of the sock. After you have completed the increases, you will have the total number of stitches for your sock.
Forming the toe of the sock
When knitting toe-up socks, after casting on, you’ll need to increase the stitch count to shape the toe. The initial cast-on provides just enough stitches to cover the tip of the toe, so you’ll need to gradually increase the stitch count to fit the width of your foot. The most common way to increase stitches for the toe is through symmetrical increases, which gradually expand the fabric as you knit.
There are two main types of increases used in toe-up socks: Make One (m1) and Knit Front Back (kfb). Either can be used, depending on your preference, but I prefer the m1 method. The reason is that kfb gives a horizontal bar on the edges of the sock every time you work an increase, and personally I don’t like how it looks. The m1 is much smoother and neater.
Pattern
Abbreviations
k knit
kte knit all stitches to end of needle
kte-1 knit all stitches on needle till one stitch left
m1l make 1 left
m1r make 1 right
Instructions
Note that there are 3 instructions given in round brackets, these are for socks size (small, medium, large). Refer to the table HERE for details on which size you are making.
Continue with the solid color yarn and the circular needles. You will have half your stitches on needle 1 and half on needle 2. This will stay that way till the end of the sock.
Round 1 (k1, m1r, kte-1, m1l, k1) on each needle.
[24, 28, 32]
Round 2 kte on both needles.
[24, 28, 32]
Rounds 3 Repeat Round 1.
[28, 32, 36]
Round 4 Repeat Round 2. Flip the sock so that the stockinet stitches are on the outside. Mark the fabric on needle 1 with a stitch marker.
[28, 32, 36]
Round 5 onwards Repeat Round 1 and 2 (7, 8, 9) more times till given stitch count. Cut the yarn when reaching the final stitch count.
[56, 64, 72]
Gauge
The gauge for the socks given in this pattern is 5cm x 5cm equals 15 stitches x 19 rows in stockinet stitch.
If due to personal tension and if the socks do not fit with the given gauge and stitch count, you can also increase to 52, 60 or 68 stitches if needed. It is important the total number of stitches is a multiple of 4 so that the cuff works out nicely.
A few notes when knitting the toe
The increases m1r and m1l are fiddly and can slip off your needle. It helps to keep your left finger on the bar you picked up when working through it. Additionally, be sure to work through the back or front loop as indicated in the video. If you work through the wrong loop, which is the “easy” loop, you will have small holes in your sock.
After knitting the stitches on a needle, you will have to turn your work and pull your needle back. Then pull out the other needle and continue knitting. In the video I show how to do this.
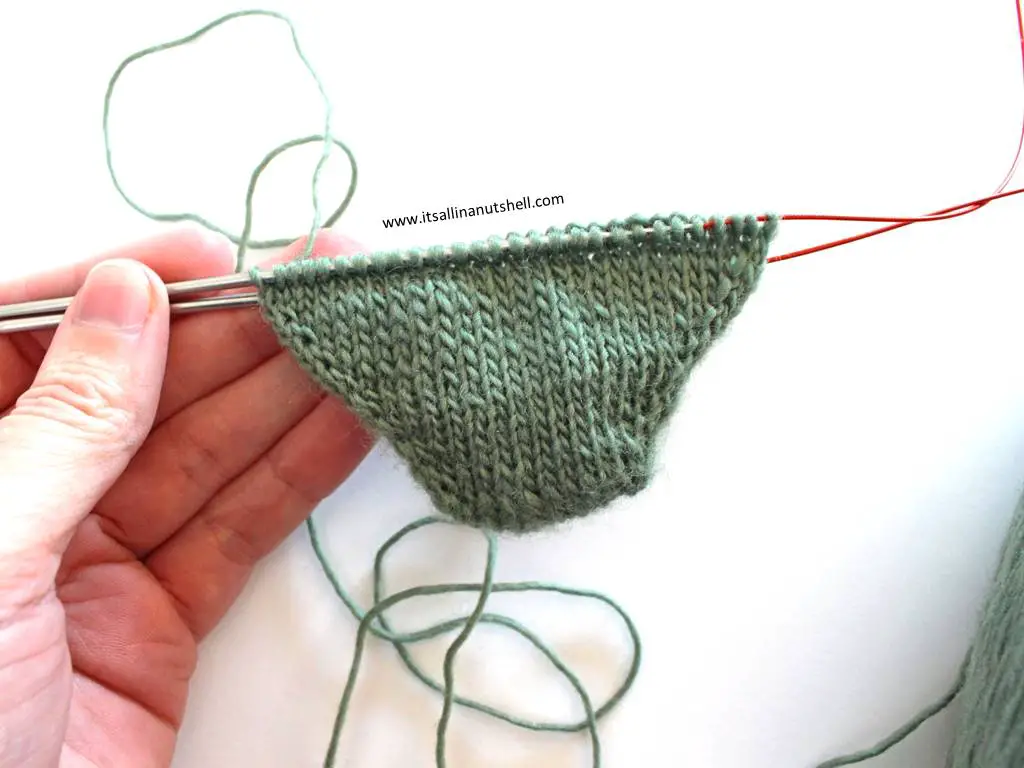
After knitting Round 4, flip the sock so that the purl bumps are on the inside of the sock and the stockinet stitches are on the outside. This process leaves your working yarn on the back needle. Push the yarn tail to the inside of the sock so that it’s out of the way.
The fabric that is facing you at this point is on needle 1, and the fabric on the back needle is on needle 2. Place a removable stitch marker on the fabric of needle 1. The stitches on needle 1 are the bottom half of the sock and is where we will knit the heel later on. When you venture into pattern knitting or textures on your sock, only knit the pattern on the stitches of needle 2 so that the bottom of the sock remains smooth and comfortable to wear.
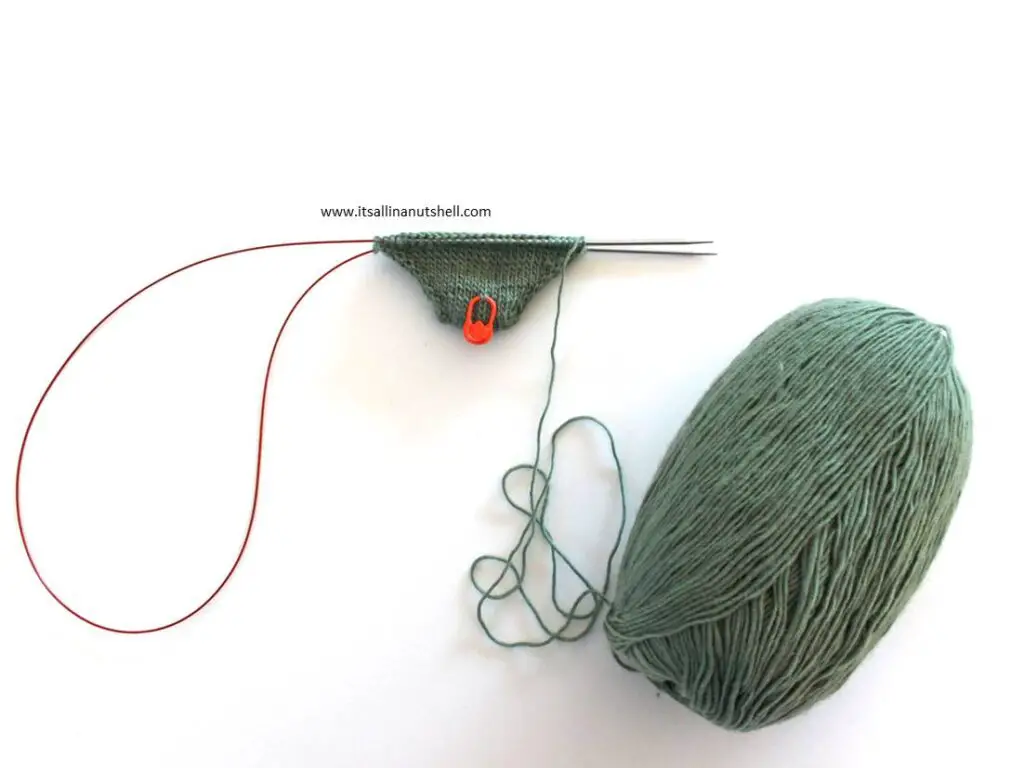
Your sock at this point
After completing the toe, your sock is starting to look a little like a sock. It will look something like this.
Support me and my work
There are many ways that you can support me and my work and most of them are free. By visiting my website you are already supporting me! Also by viewing any of the free videos on my YouTube channel you support me.
Other ways to support me are to make a purchase from one of my affiliates. I get a small commission based on your purchase after you click one of the links on my website. It costs you absolutely nothing but helps me a lot. My affiliates are Amazon.co.uk, KnitPicks, Wool Warehouse, Jimmy Beans Wool, Minerva Craft, The Knitting Network, Love Crafts, and Caro’s Atelier.
If you would like to support me in ways that are out of pocket for you, you could buy any of my patterns on Ravelry or my SHOP. You can also make a DONATION, which I really appreciate. Even a small amount helps me to keep my small business running.
#itsallinanutshell
If you are making something with one of my patterns or one of my videos, I would love to see your work. Use the hashtag #itsallinanutshell on Instagram to help me find it, share your work in my It’s all in a Nutshell Crochet Nuts group on Facebook or tag me in one of your posts.
With love,
Esther
Follow me on
Facebook, YouTube, Ravelry, Instagram
This post contains affiliate links. Please read my disclosure and copyright policy. All opinions are my own and I only link to products I use or would use. Thank you for using the links on my blog and supporting my work.
Copyright (c) 2014-2025 It’s all in a Nutshell Creations. All rights reserved.
Discover more from It's all in a Nutshell Crochet
Subscribe to get the latest posts sent to your email.