The leg of the sock in the start of the homestretch, you can start to see the finish line at this point. Knitting the leg is exactly the same as the foot of the sock, relaxing stockinet stitches in the round. In the video tutorial I again show you how to make these stitches.
In the leg video tutorial I show you how to continue the main body of the sock, and especially what to do with the double stiches that are still on the needle from the heel. After the start-up, it’s plain sailing once again.
Pattern
Abbreviations
k knit kte knit all stitches to end of needle DS double stitch
Instructions
Note that there are 3 instructions given in round brackets, these are for socks size (small, medium, large). Refer to the table HERE for details on which size you are making.
At this point the heel is completed and you have fastened off the solid color you used for the heel. Continue with the second (color changing) yarn that is still attached to your work. You will have half your stitches on needle 1 and half on needle 2. You will also still have 4 double stitches on the first needle. We will deal with those right away.
Round 1 k first 2 DS, k till DS, k last 2 DS on needle 1, kte on needle 2. [56, 64, 72]
Round 2 kte on both needles. [56, 64, 72]
Rounds 3 onwards Repeat Round 2 for in total (50, 54, 58) times till correct length of the foot. Fasten off color changing yarn. [56, 64, 72]
Gauge
The gauge for the socks given in this pattern is 5cm x 5cm equals 15 stitches x 19 rows in stockinet stitch.
With the given gauge, the number of rows given should be in the order needed for the sock to have a comfortable length. However, you can easily change the length of the leg to suit your needs, so make it longer or shorter as needed. I like to have the leg the same length as the foot, but this is personal preference.
A few notes when knitting the leg
Also here, pay attention to your yarn tension at the edge of the sock so that you don’t get any ladders just like you did for the foot of the sock.
If you are working a pattern, you can continue with the pattern from the foot on needle 2, and possible also start with the pattern on needle 1 depending on what look you are going for.
For the rest, enjoy!
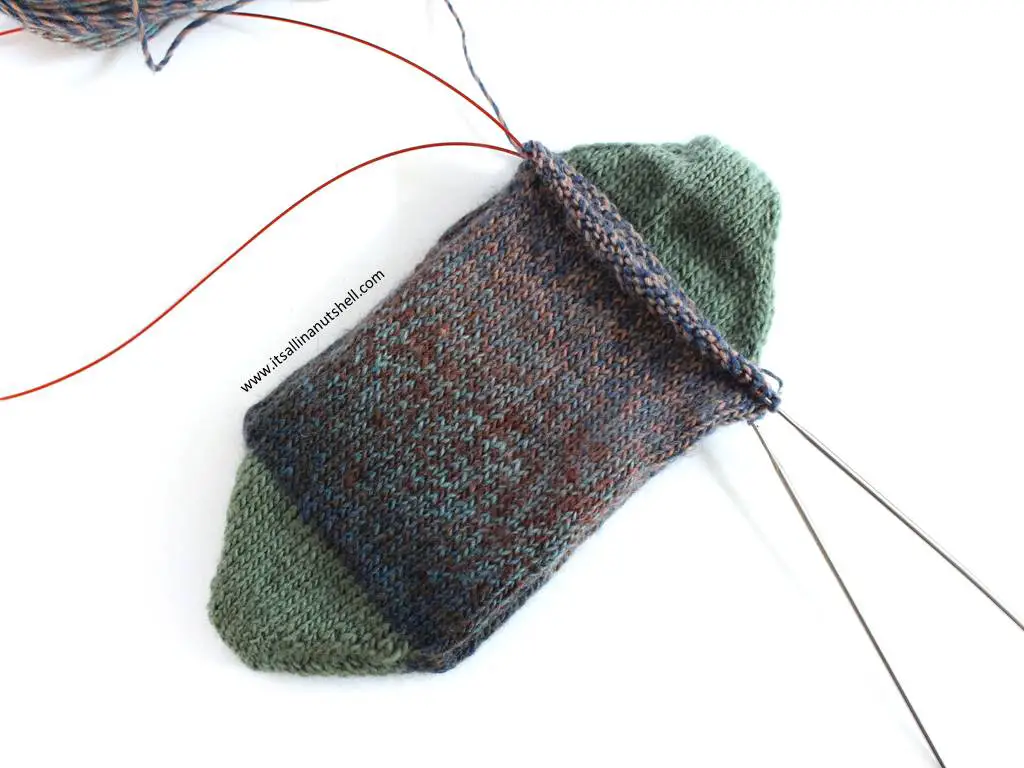
Your sock at this point
After completing the leg, your sock is almost done. Your work will now look something like this.
Support me and my work
There are many ways that you can support me and my work and most of them are free. By visiting my website you are already supporting me! Also by viewing any of the free videos on my YouTube channel you support me.
If you would like to support me in ways that are out of pocket for you, you could buy any of my patterns on Ravelry or my SHOP. You can also make a DONATION, which I really appreciate. Even a small amount helps me to keep my small business running.
#itsallinanutshell
If you are making something with one of my patterns or one of my videos, I would love to see your work. Use the hashtag #itsallinanutshell on Instagram to help me find it, share your work in my It’s all in a Nutshell Crochet Nuts group on Facebook or tag me in one of your posts.
This post contains affiliate links. Please read my disclosure and copyright policy. All opinions are my own and I only link to products I use or would use. Thank you for using the links on my blog and supporting my work.
Copyright (c) 2014-2025 It’s all in a Nutshell Creations. All rights reserved.
You might also like
Discover more from It's all in a Nutshell Crochet
Subscribe to get the latest posts sent to your email.