Here you find the free crochet pattern for my Spectrum corner-to-corner crochet blanket with an ombre colorway. Due to the double strand this project works up fast and the final result is a very warm blanket. This project is perfect for stash busting if you have half-balls of yarn left from other projects.
Resources
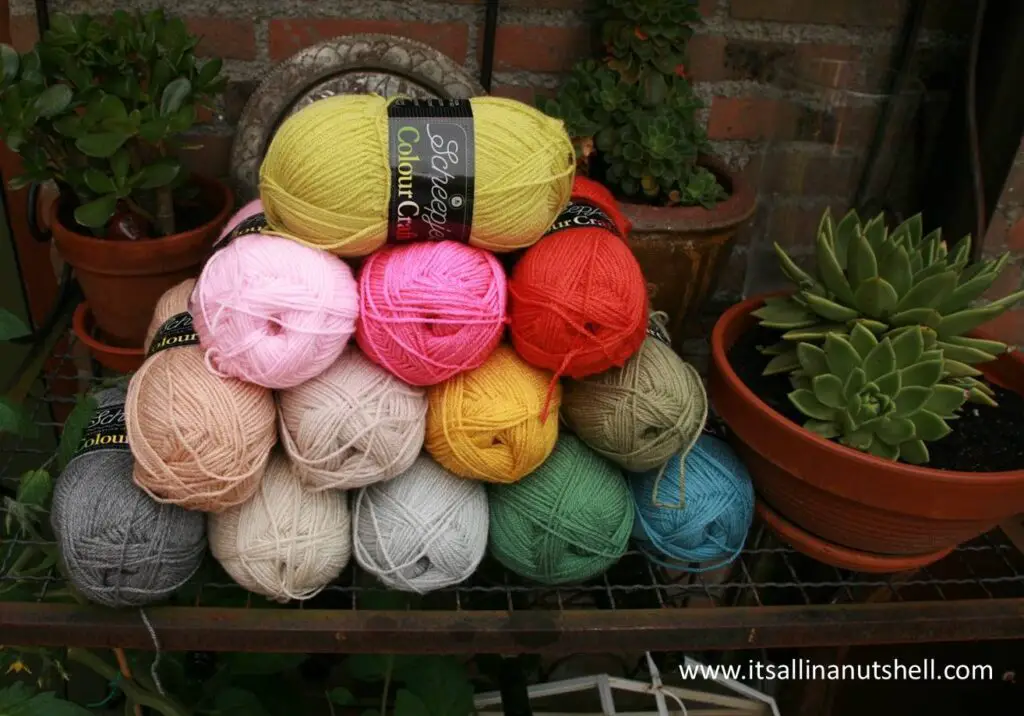
Materials
You will need 18 colors of Scheepjes Colour Crafter; one ball of every color except for Wolvega for which you need 3 balls. One 100g ball of Colour Crafter contains 300 meter of yarn.
Scheepjes Colour Crafter is available in over 90 colors from Wool Warehouse (UK/Int), Jimmy Beans Wools (USA), The Knitting Network, Caro’s Atelier (NL/EU) or your local Scheepjes stockist.
For the Spectrum blanket you will need the following:
- Color A: Vlissingen (1723) – 25m
- Color B: Coevorden (1823) – 50m
- Color C: Nijmegen (1712) – 90m
- Color D: Delfzijl (1822) – 125m
- Color E: Assen (1065) – 165m
- Color F: Enschede (1824) – 205m
- Color G: Alphen (1722) – 240m
- Color H: Dokkum (1302) – 285m
- Color I: Amstelveen (1277) – 285m
- Color J: Wolvega (1099) – 675m
- Color K: Sint Niklaas (2019) – 250m
- Color L: Zandvoort (1218) – 225m
- Color M: Hasselt (2010) – 205m
- Color N: Ermelo (1710) – 180m
- Color O: Venlo (1080) – 145m
- Color P: Sittard (1130) – 90m
- Color Q: Den Bosch (1241) – 50m
- Color R: Luik (2006) – 30m
You will also need a 6.5mm crochet hook and a needle to work away yarn tails.
Final Measurements
The final size of your blanket will depend on your gauge and personal style of crochet. If you follow my gauge and blocking your blanket will be approximately 135cm x 155cm when finished. This is a comfortable lapghan for use in a comfy couch.
Abbreviations
Please note that US Crochet Terminology is used for this pattern. If you are more familiar with UK terms, please use this conversion chart as needed.
- ss – slip stitch
- s – stitch
- ch – chain
- dc – double crochet
- RS – right side
- WS – wrong side
- pixel – ch3 and 3dc worked into a ch3-space
Notes
The entire blanket is worked using two strands of yarn at the same time. Sometimes you work with two strands that have the same color, sometimes two strands with a different color. Keep paying attention to changing color at the appropriate points. When changing color you will always change only one of the two strands.
Tip: split each ball of yarn into two equal cakes to make it more easy to use two identical strands at the same time.
This blanket is made using corner-to-corner technique. I have a video tutorial available that is part of my Crochet Fundamentals series to show you the general steps involved in C2C.
Gauge
As such, gauge is not critical for this project. If you want to obtain a blanket similar in size to mine your blanket should to be about 14cm x 14cm after row 6 (unblocked). Change your hook size appropriately if needed.
Spectrum C2C Blanket – Free Crochet Pattern
Work the blanket in 4 distinct stages; first start with increasing the diagonal of the blanket, secondly keep the diagonal constant and increase only the length of the blanket, thirdly decrease the diagonal of the blanket to finish the inner part, and lastly make the border.
Increasing the diagonal
In the first part of the pattern increase the diagonal till the width of the main part of the blanket is reached.
Row 1 (RS) Use two strands of Color A. Ch6 (counts as ch3 and 1dc), 1dc in fourth ch from the hook and in each of the next 2 ch to the end. Turn your work. [1 pixel]
Row 2 (WS) Ch6 (counts as ch3 and 1dc), 1dc in fourth ch from the hook and in each of the next 2 ch to complete a pixel. With the WS of pixel 1 facing and the RS of the pixel of Row 2 just worked facing, line up the top of the dc just worked with the top of the dc’s of from Row 1 so that the 2 pixels are touching. ss in the space created by the ch3 at the top of pixel of Row 1, ch3, 3dc in ch3-space. Turn your work. [2 pixels]
Row 3 (RS) Ch6 (counts as ch3 and 1dc), 1dc in fourth ch from the hook and in each of the next 2 ch to complete a pixel. Rotate the pixel just worked so that you can ss in the ch3-space at the top of the last block worked from Row 2. ch3, 3dc in same ch3-space as the ss. ss in ch3-space at the top of the next pixel, ch3, 3dc in the same ch3-space as the ss. Turn your work. [3 pixels]
Row 4 Ch6 (counts as ch3 and 1dc), 1dc in fourth ch from the hook and in each of the next 2 ch to complete a pixel. Rotate the pixel just worked so that you can ss in the ch3-space at the top of the last block worked from the previous row. * ch3, 3dc in same ch3-space as the ss. ss in ch3-space at the top of the next pixel. * Repeat from * to * until you have worked a ss in the ch3-space of the last block of the previous row. ch3, 3dc in the same ch3-space as the ss. Turn your work. [1 pixels more than the previous row]
Rows 5 – 47 Repeat Row 4 using the following colors for each row:
- row 1 – 4: 2 strands of Color A (already worked, but given to be complete)
- row 5 & 6: 1 strand of Color A & 1 strand of Color B
- row 7 – 10: 2 strands of Color B
- row 11 & 12: 1 strand of Color B & 1 strand of Color C
- row 13 – 16: 2 strands of Color C
- row 17 & 18: 1 strand of Color C & 1 strand of Color D
- row 19 – 22: 2 strands of Color D
- row 23 & 24: 1 strand of Color D & 1 strand of Color E
- row 25 – 28: 2 strands of Color E
- row 29 & 30: 1 strand of Color E & 1 strand of Color F
- row 31 – 34: 2 strands of Color F
- row 35 & 36: 1 strand of Color F & 1 strand of Color G
- row 37 – 40: 2 strands of Color G
- row 41 & 42: 1 strand of Color G & 1 strand of Color H
- row 43 – 46: 2 strands of Color H
- row 47: 1 strand of Color H & 1 strand of Color I
Constant diagonal
In this part the diagonal is kept constant. This means that the number of pixels per row is the same for each row. At this point you should have 47 pixels on your diagonal.
Row 48 Turn your work. Using 1 strand of Color H & 1 strand of Color I ss into the next stitches and into the ch3-space. * ch3, 3dc in same ch3-space as the ss. ss in ch3-space at the top of the next pixel. * Repeat from * to * until you have worked a ss in the ch3-space of the last block of the previous row. ch3, 3dc in the same ch3-space as the ss. Turn your work. [47 pixels]
Row 49 Using 2 strands of Color I, ch6 (counts as ch3 and 1dc), 1dc in fourth ch from the hook and in each of the next 2 ch to complete a pixel. Rotate the pixel just worked so that you can ss in the ch3-space at the top of the last block worked from the previous row. * ch3, 3dc in same ch3-space as the ss. ss in ch3-space at the top of the next pixel. * Repeat from * to * until you have worked a ss in the ch3-space of the last block of the previous row. Do not work a pixel on top of the last pixel from the previous row. [47 pixels]
Rows 50 – 59 Repeat Rows 48 and 49 using the following colors for each row:
- row 48: 1 strand of Color H & 1 strand of Color I (already worked, but given to be complete)
- row 49 – 52: 2 strands of Color I (already worked, but given to be complete)
- row 53 & 54: 1 strand of Color I & 1 strand of Color J
- row 55 – 58: 2 strands of Color J
- row 59: 1 strand of Color C & J strand of Color K
Decreasing the diagonal
In this part of the pattern the diagonal is decreased to form a rectangle.
Row 60 Turn your work. Using 1 strand of Color J & 1 strand of Color K ss into the next stitches and into the ch3-space. * ch3, 3dc in same ch3-space as the ss. ss in ch3-space at the top of the next pixel. * Repeat from * to * until you have worked a ss in the ch3-space of the last block of the previous row. Turn your work without working on top of the last pixel. [1 pixels less than the previous row]
Rows 61 – 105 Repeat Row 60 using the following colors for each row:
- row 60: 1 strand of Color J & 1 strand of Color K (already worked, but given to be complete)
- row 61 – 64: 2 strands of Color K
- row 65 & 66: 1 strand of Color K & 1 strand of Color L
- row 67 – 70: 2 strands of Color L
- row 71 & 72: 1 strand of Color L & J strand of Color M
- row 73 – 76: 2 strands of Color M
- row 77 & 78: 1 strand of Color M & J strand of Color N
- row 79 – 82: 2 strands of Color N
- row 83 & 84: 1 strand of Color N & J strand of Color O
- row 85 – 88: 2 strands of Color O
- row 89 & 90: 1 strand of Color O & J strand of Color P
- row 91 – 94: 2 strands of Color P
- row 95 & 96: 1 strand of Color P & J strand of Color Q
- row 97 – 100: 2 strands of Color Q
- row 101 & 102: 1 strand of Color Q & J strand of Color R
- row 103 – 105: 2 strands of Color R
Cut off your yarn and bind off.
Yarn tails & blocking
Before continuing with the border it is wise to work away all your yarn tails from the center of the blanket. I also suggest blocking your center before doing the border. The C2C stitches tend to pull inward and your border will be very wobbly if you don’t block the blanket first.
The unblocked inner part of your blanket will be about 110cm x 130cm. Block this to 125cm x 145cm. Your blocked blanket will look something like this.
Border
Row 1 *(sc, ch2, sc) in the corner of any pixel at the corner of the blanket. ** ch3, skip the next pixel, sc between two pixels. ** Repeat from ** to ** till the last pixel, ch3, skip to the corner pixel. * Repeat from * to * 3 more times. Close with a ss to the first s. ss to corner ch2-space.
Row 2 (ch3, dc, ch2, 2dc) in ch2-space. *skip next sc, 3dc in next ch3-space * Repeat from * to * till the last ch3-space, skip last sc. *(2dc, ch2, 2dc) in ch2-space. ** skip next sc, 3dc in next ch3-space. ** Repeat from ** to ** till the last ch3-space, skip last sc. * Repeat from * to * 2 more times. Close to ch3 with ss. ss to ch2-space.
Row 3 (ch3, dc, ch2, 2dc) in ch2-space. 1dc in every s till the end. *(2dc, ch2, 2dc) in ch2-space. 1dc in every s till the end. * Repeat from * to * 2 more times. Close to ch3 with ss. ss to ch2-space.
Row 4 – 6 Repeat row 3. Close row 6 with an invisible join.
Block again to Finish
Weave in all ends and block one more time to approximately 135cm x 155cm. Especially the border will need blocking because it will wobble a bit after completing.
And then you are all done!
#itsallinanutshell
If you are making something with one of my patterns or one of my videos, I would love to see your work. Use the hashtag #itsallinanutshell on Instagram to help me find it, share your work in my It’s all in a Nutshell Crochet Nuts group on Facebook or tag me in one of your posts.
With love,
Esther
Follow me on
Facebook, YouTube, Ravelry, Instagram
This post contains affiliate links. Please read my disclosure and copyright policy. All opinions are my own and I only link to products I use or would use. Thank you for using the links on my blog and supporting my work.
Copyright (c) 2014-2025 It’s all in a Nutshell Creations. All rights reserved.
Discover more from It's all in a Nutshell Crochet
Subscribe to get the latest posts sent to your email.
So mooi!!! Baie dankie vir die patroon!! ???
This is wonderful – thanks for posting it for us all 🙂
🙂
Begrijp ik het goed, dat een C2C deken altijd vierkant is?
Heel leuk haken trouwens 😉
Nee hoor, deze deken Is juist niet vierkant. Op een gegeven moment ga je alleen in een richting verlengen en krijg te een rechthoek.
Brilliant Esther – thank you so much – a nice relaxing project for the cold nights to come in front of the TV.
Exactly!
Hi can you tell me what you mean by blocking?
It means that you make your work look perfect by pulling and setting it to the right shape. Here a video showing you how.
https://www.youtube.com/watch?v=SYeH30lNrGQ
Esther I was looking over this pattern and I am confused about your use of the word “pixel.” In my world of computers and graphic art a pixel is a tiny square of an image. What is a pixel in your lovely world?
Please let me know so I can write it by the word on the pattern.
Thank you for sharing this with us!! I love your My Tribe color as well and have two on order!!
Thank you,
Jana
A pixel is one square in the c2c pattern