When you are learning to crochet, it is important that you also gain insight in how crochet stitches are build, in other words, which loop makes which part of the stitch. Understanding the anatomy of a stitch will help you to comprehend how more difficult crochet stitches and techniques work. In this tips and tricks post as part of my TLC Blanket I discuss stitch anatomy.

Resources
- Add TLC Blanket to your Ravelry library
- Full PDF pattern containing all 8 parts plus links to all the videos
- All RIGHT HANDED Video tutorials in one YouTube playlist
- All LEFT HANDED Video tutorials in one YouTube playlist
- Scheepjes Chunky Monkey yarn (100g/107m)
- 5.0mm (US size H/8) and 6.5mm (US size K/10.5) hook
- Find help in my It’s all in a Nutshell Facebook Group
- Nederlandse vertaling HIER
- Social Media #itsallinanutshell
Crochet Stitch Anatomy
There is a certain logic to the way stitches are constructed, and the moment you see this logic, a world opens up to you. It’s like that moment when you learn to read, a world of possibilities opens up.
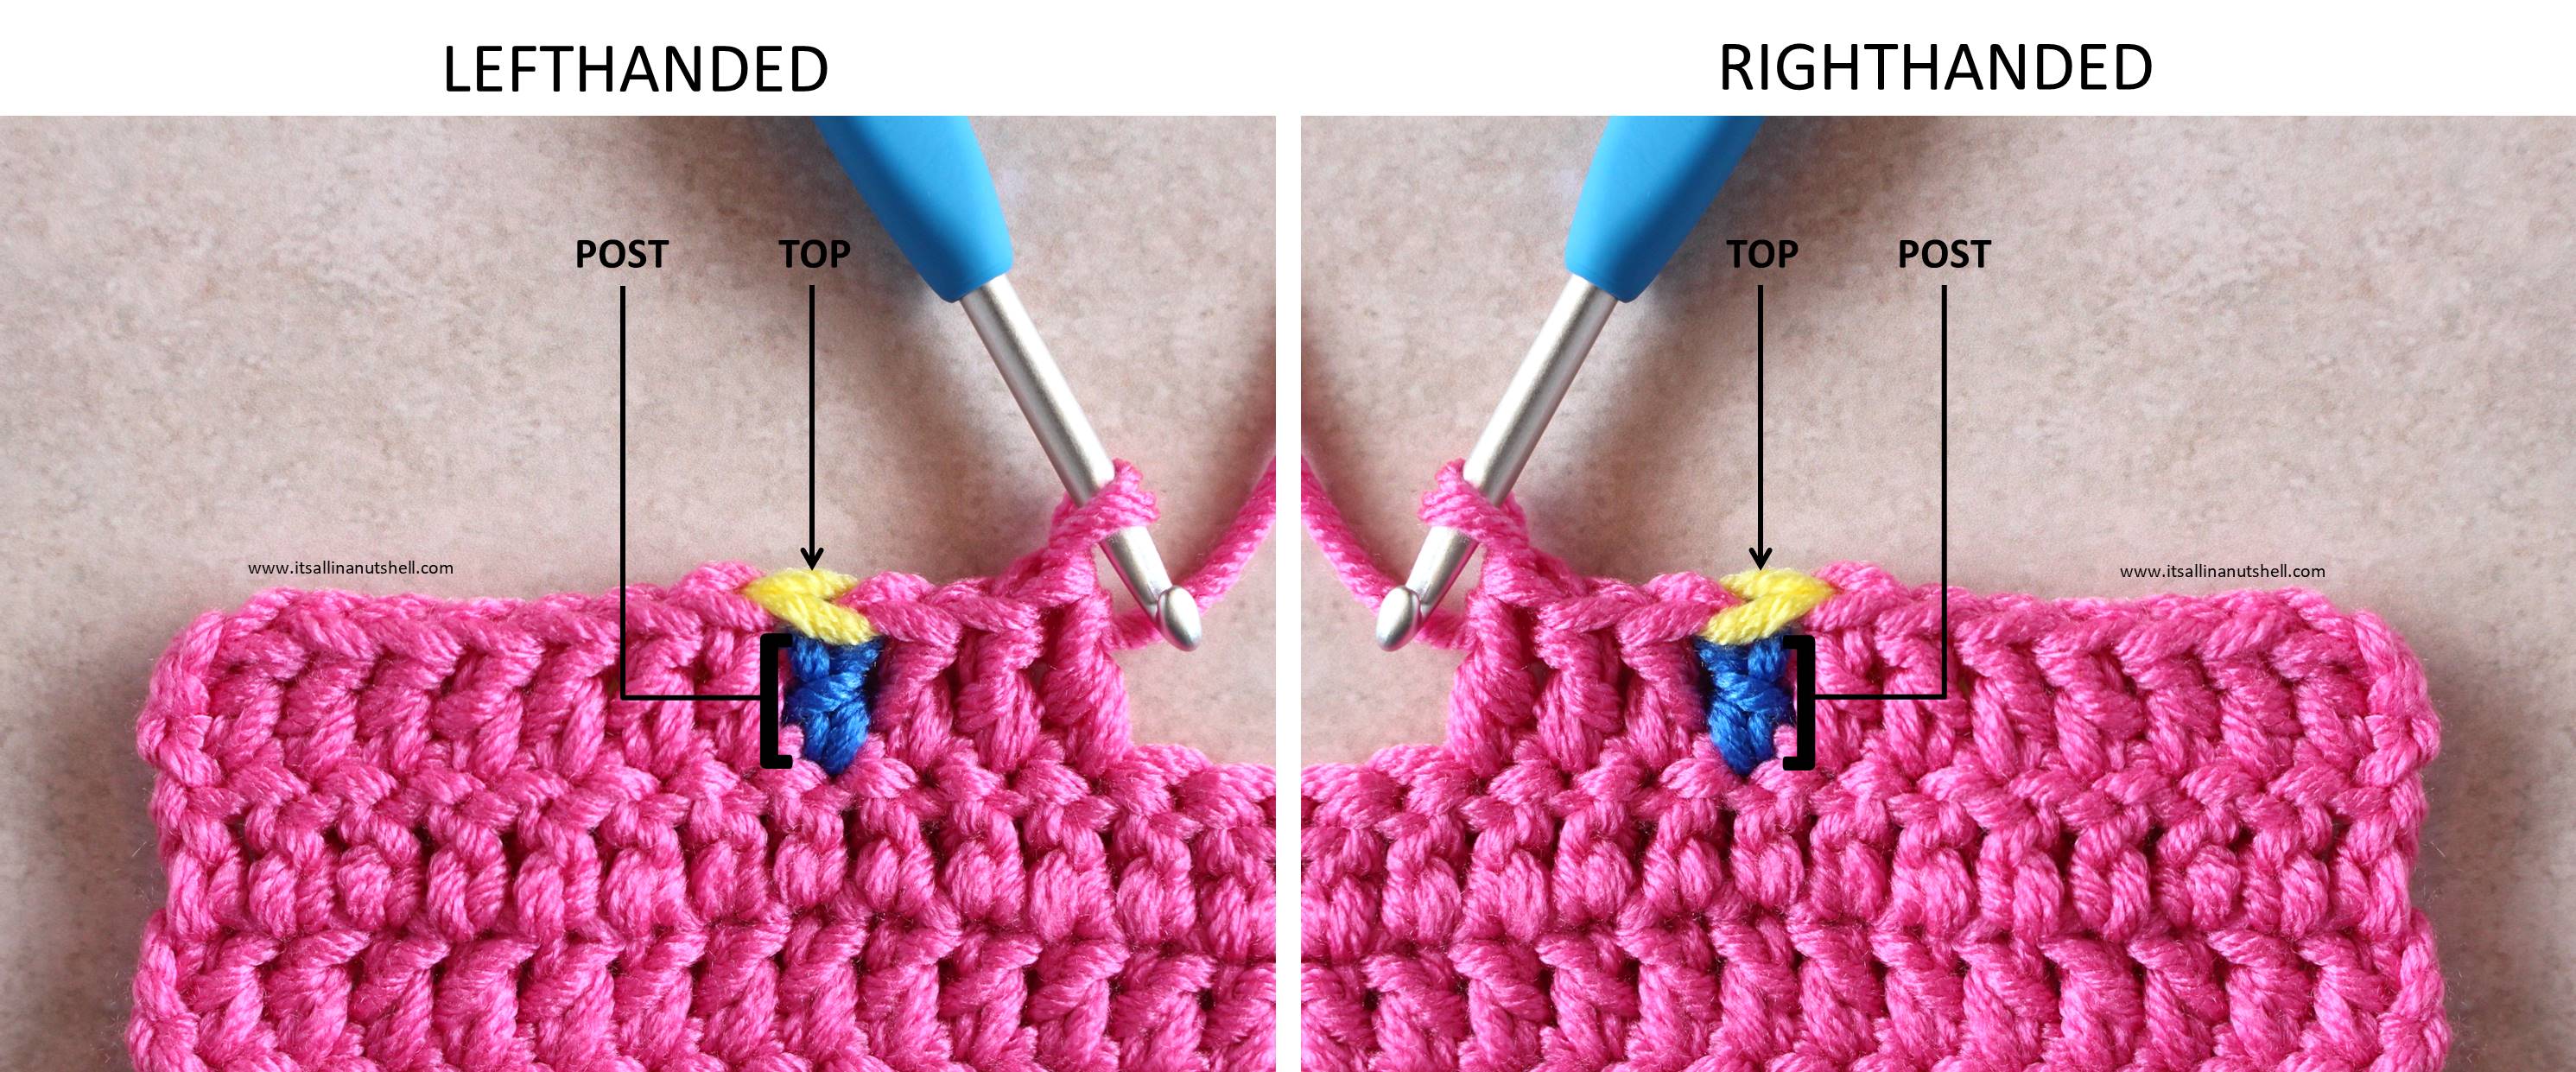
Crochet stitches have two parts; the top part of the stitch which has a V-shape (yellow), and the post part of the stitch which is the long part of the stitch (blue). When working INTO a stitch, you insert your hook underneath both of the yellow loops that make up the V-shape at the top of the stitch. When you work AROUND a stitch, you insert your hook around the blue post part of the stitch.

The way stitches are constructed is perhaps a bit contrary to what your intuition might say. The loop that is on your hook is actually the start of the next stitch, the V-part (yellow) of the stitch. The yarn-overs that you make around your hook and the loops that you pull up make the post part (blue) of the stitch.
This might all sound a bit complicated. I have made a short left handed and right handed video in which I aim to explain how stitches are constructed and which part of the loops and yarn overs become which part of the stitch.
This tips and tricks post was bit more theoretical than what we have had up to now, but I hope that it gives you insight in how stitches are made.
Learn to crochet and make a TLC Blanket of your own
If you want to make a TLC Blanket of your own, you can find all the information you need HERE. I have all the information available in English and Dutch.

With love,
Esther

Follow me on
Facebook, YouTube, Ravelry, Instagram
This post contains affiliate links. Please read my disclosure and copyright policy. All opinions are my own and I only link to products I use or would use. Thank you for using the links on my blog and supporting my work.
Copyright (c) 2014-2025 It’s all in a Nutshell Creations. All rights reserved.
Discover more from It's all in a Nutshell Crochet
Subscribe to get the latest posts sent to your email.


The video was really helpful thank you!
Thank you! That is very wonderful to see the workings of a stitch.
Wow, thank you for including us lefties!
I first taught myself to crochet over ten years ago, but I find that I’ve had to re-learn quite a few aspects. I think that’s mostly due to everything being written/modeled for right handed users.
Thank you so much for this slow explanation of how a crochet stitch is made. I have really enjoyed watching the video.
the “anatomy of a stitch” is interesting, but I’m not sure what the small diagonal bar under the top (or V-part) is called. When i work in half double crochet to make ribbing, that’s where i insert the hook to make the “V” pop out on the other side.
Is that the famous “back loop”?
The is the so-called third loop