
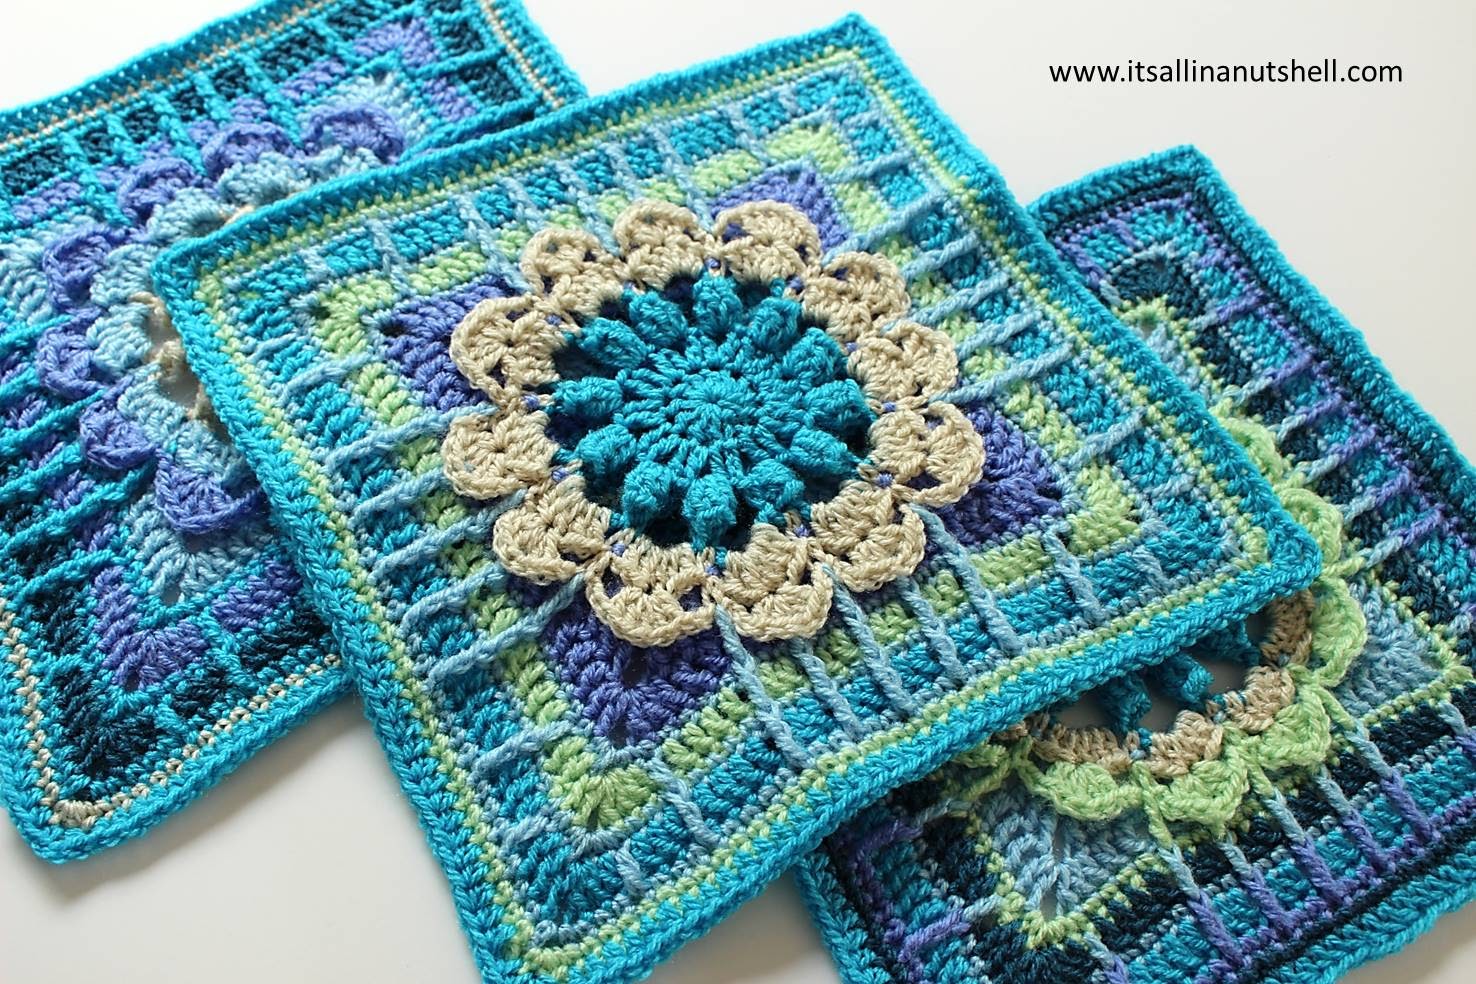
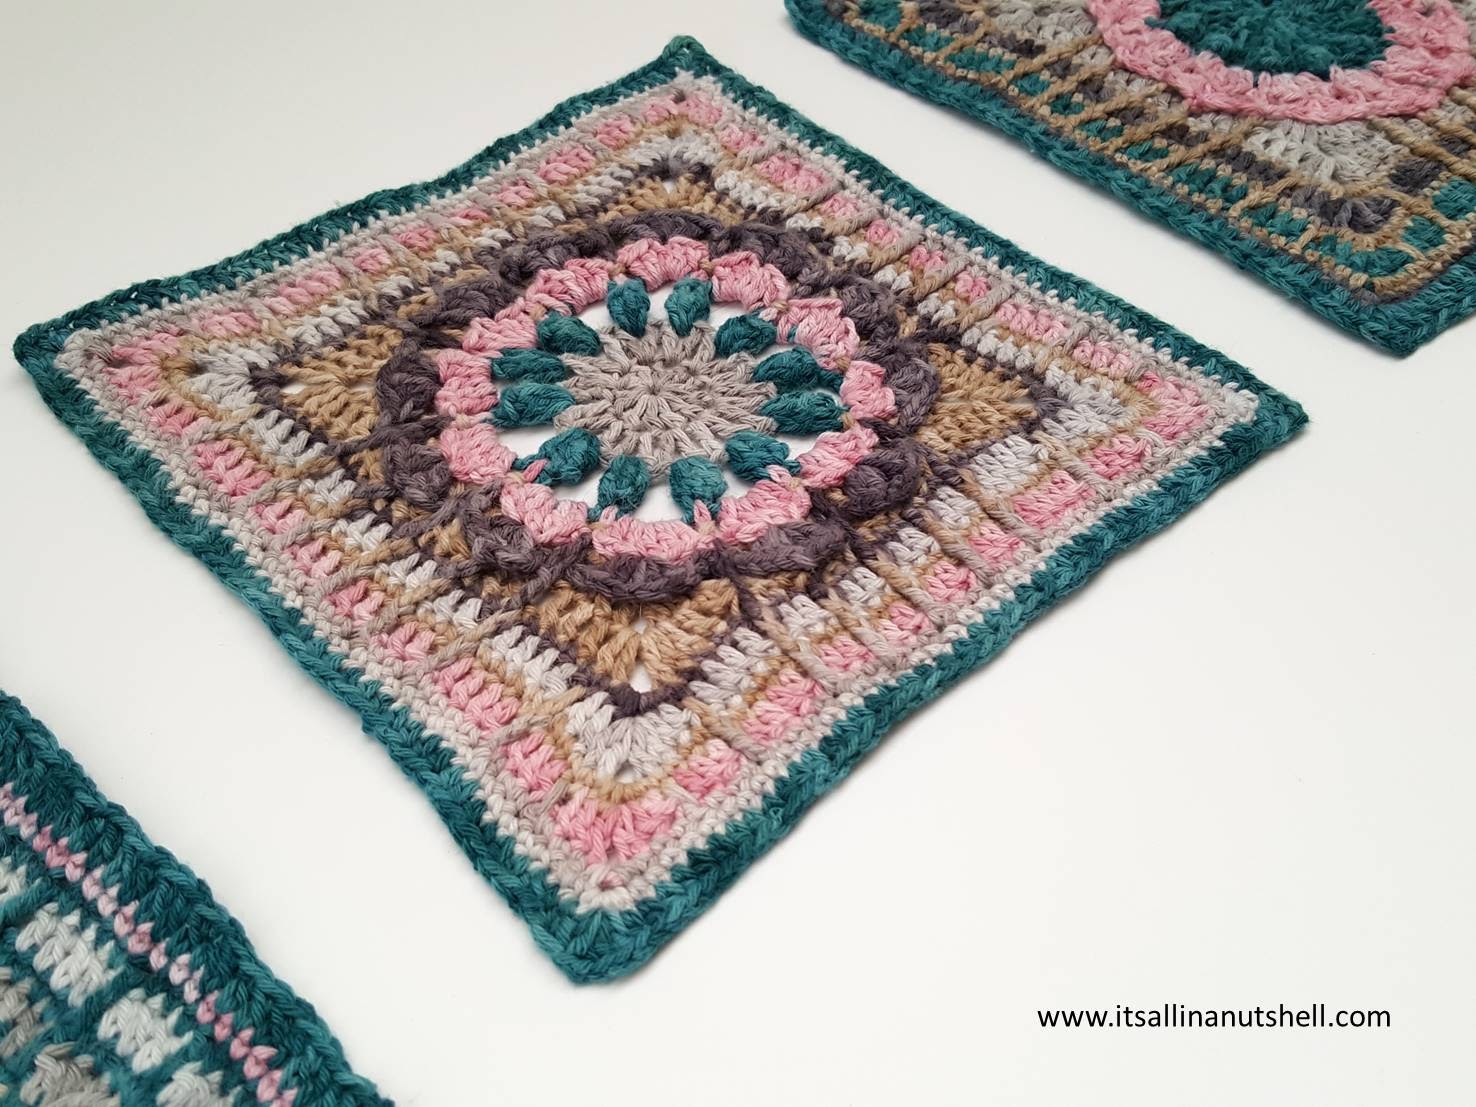
This week is holiday week for me so I have had time to take it just a little slower than usual. Have you had a moment of rest lately? Rest is important for our minds, bodies and souls. After that philosophical note, let me get back to what you are here for, part 5 of Nuts about Squares CAL. This week a fun floral square designed by Melissa Green. An important note for this week, be sure to go up a hook size.
Resources and useful links
- Add Nuts About Squares CAL on Ravelry
- Nuts about Squares CAL Information
- Written pattern Rachel in English (US Terms) on Ravelry
- Written instructions for Nuts about Squares part 5 in this post
- *** RIGHT HANDED Video Tutorial *** for Rachel
- *** LEFT HANDED Video Tutorial *** for Rachel
- All RIGHT HANDED Nuts about Squares video tutorials in one YouTube playlist
- All LEFT HANDED Nuts about Squares video tutorials in one YouTube playlist
- Color chart Week 5 showing the color placement for all squares
The pattern is published on Ravelry. If you are not a member of this platform you can make a free account or download the pattern as a guest. Ravelry is a large platform with thousands of free, legal patterns.
NEDERLANDS / Dutch
- Nederlands geschreven patroon voor Rachel op Ravelry
- Nederlandse geschreven instructies voor Nuts about Squares deel 5 in deze post
- Kleurkaat Week 5 met de kleurverdeling per toer
Het patroon staat op Ravelry. Als je nog geen lid bent van dit platform kun je een gratis account aanmaken of als gast een patroon downloaden. Ravelry is een groot platform met duizenden gratis, legale patronen. Click op “Free Ravelry Download” op het patroonpagina en sla de Nederlandse vertaling op.
Yarn kits
The 3 colorways Nuts about the Earth, Nuts about the Sea, and Nuts about the Sky are no longer available as kits. I have a detailed post with all the yarn information, amounts, weights and color combinations for the 3 colorways, you can find the yarn/color information HERE.
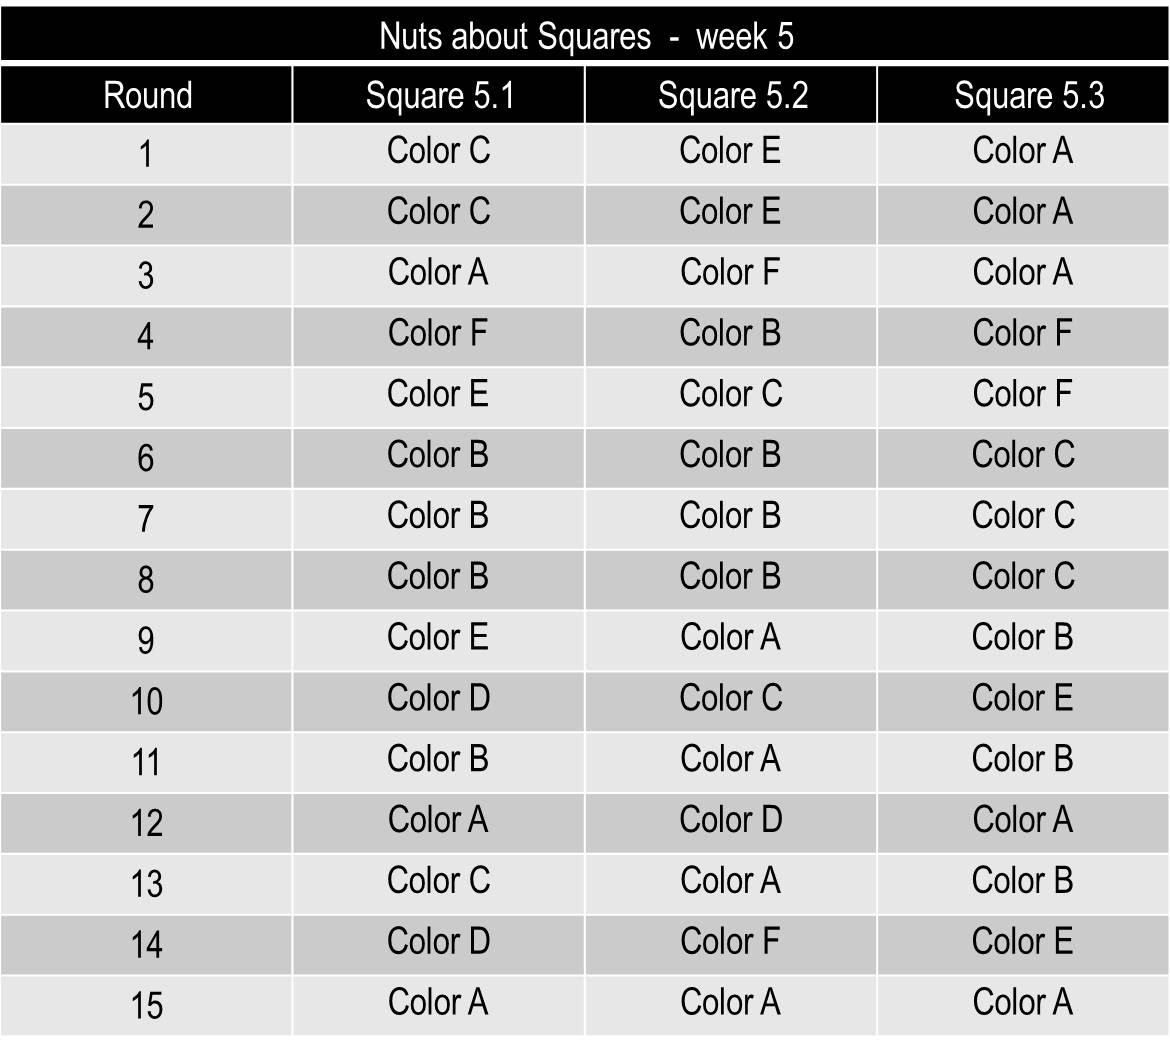
Color chart
The colors for each row are given in the Color Chart Week 5 for each of the three colorways or you can follow the general colorway in the table below.
Instructions Nuts about Squares week 5
Use the following hook sizes to make your squares or the hook size you need to get the correct size (Note that this is 0.5mm larger than what you have used up till now):
- Color Crafter – 4.5mm
- Stone Washed – 4.0mm
- Sunkissed – 3.5mm
Update: When testing my testers and I found that Rachel turned out smaller than our other squares and we needed to go up a hook size to get all the squares the same size. However, I notice that some of your squares turn out too large if you go up a hook size. If you suspect that your tension is such that you may end up with a too large square, then don’t go up a hook size. If your square then does happen to be smaller, make Round 15 with dc or tr instead of hdc.
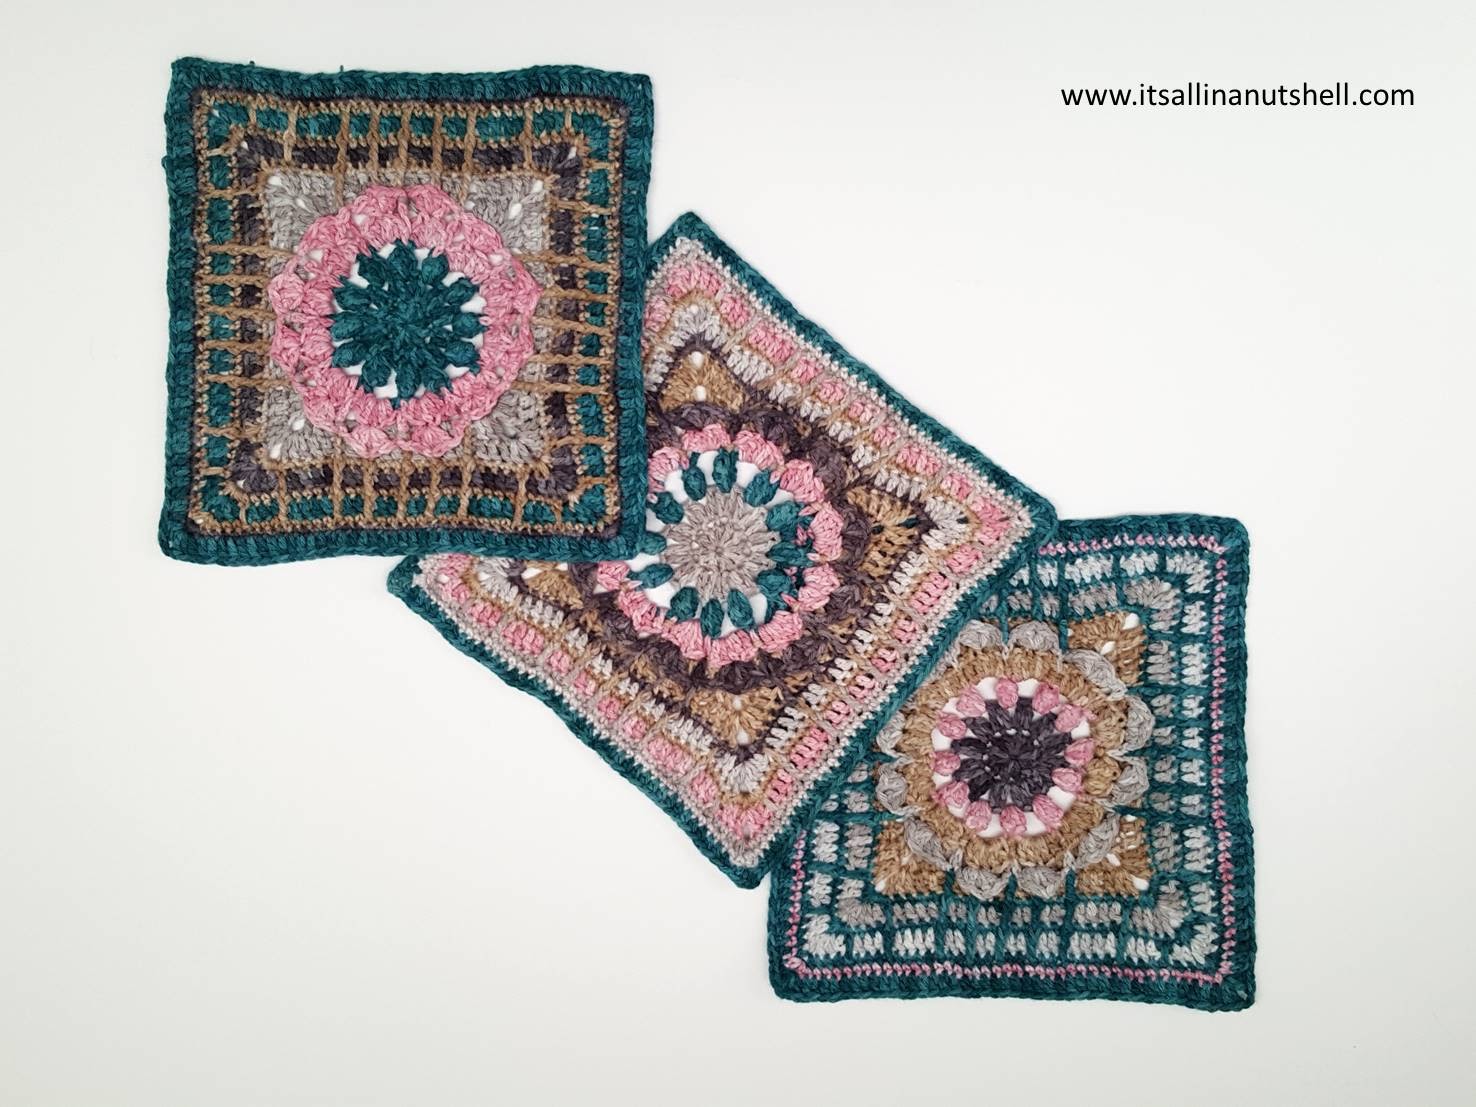
Work Rounds 1 to 14 according to the written pattern or video tutorial using the colorway for week 5 given above. Work 3 squares in total.
A small tip for round 9: I replaced the tr with a bptr to catch the 3rd dc of the flower petals along the straight edge. This way the petals are secured to the square. The flower petals in the corners remain unconnected. In the video I show how to do this.
I believe there is an small error in the pattern for the stitch count of round 14. I had 41 stitches at the end of round 14. Work an extra round to bring the final stitch count to 44 stitches per side.Round 15 using color A, attach yarn with a standing hdc or ch2 in the hdc making the corner from Round 14, 1hdc in same stitch, ch2, and 2hdc in same stitch. This is your new corner made. *Skip first st, 1hdc on each of the next 40 st, (2hdc, ch2, 2hdc) in next corner-hdc. Repeat from * 3 more times, omitting the last corner on the final repeat. Join to the first st with a ss. [44 hdc per side]
Repeat Round 15 for all 3 squares. Round 15 is also shown in THIS VIDEO. Block your squares to the following sizes:
- Color Crafter – 25cm (10in)
- Stone Washed – 22cm (9in)
- Sunkissed – 20cm (7.5in)
My squares bobbled quite a bit, so I really recommend blocking this square.
Nederlandse Instructies (Dutch) voor Nuts about Squares week 5
Gebruik de volgende maat haaknaald om je vierkantjes te maken, of de maat haaknaald dat jij nodig hebt om de juiste maat vierkantje te krijgen (LET OP: Dit is 0.5mm groter dan dat je tot nu toe gebruikt hebt):
- Color Crafter – 4.5mm
- Stone Washed – 4.0mm
- Sunkissed – 3.5mm
Update: Tijdens het testen hebben mijn testers en ik gezien dat Rachel kleiner uitvalt en daarom hebben we een haaknaald groter gebruikt om hem dezelfde maat te krijgen als de vorige vierkantjes. Echter, ik zie dat bij sommige het vierkantje juist groter uitvalt als ze een haaknaald groter gebruiken. Mocht je verwachten dat je vierkantje groter zal uitvallen omdat je bijvoorbeeld los haakt, ga dan niet naar een grotere haaknaald. Mocht hij dan alsnog te klein uitvallen, maak de steken in Toer 15 langer, dus een st/dst.
Werk Toer 1 tot 14 volgens het geschreven patroon of gebruik de Engelstalige instructie video met de kleurverdeling voor week 5 zoals hierboven. Maak in totaal 3 vierkantjes.
Een kleine tip voor Toer 9: vervang het dst met een RdstA en vang het 3e stokje van de bloembladjes waardoor je de blaadjes vastzet aan je werk. In de video laat ik zien hoe ik dit doe.
Er is een kleine fout in de steektelling van het patroon, ik heb 41 steken aan het eind van Toer 14. Werk nu een extra toer om je vierkantjes heen om tot 44 steken per kant te komen. Voor Toer 15 hecht kleur A aan met een staand hst of 2l in hst-hoeksteek, 1hst in dezelfde hoeksteek, 2l, 2hst in dezelfde hoeksteek. Dit is je nieuwe hoek. *Sla de eerste steek over, 1hst in ieder van de volgende 40 steken, (2hst, 2l, 2hst) in volgende hst-hoeksteek. Herhaal vanaf * nog 3 keer waarbij je de hoek overslaat bij de laatste herhaling. Sluit met 1hv op de eerste steek en hecht af. [44 hst per kant]
Herhaal Toer 15 voor alle vierkantjes. Ik laat Toer 15 ook zien in deze Engelstalige instructievideo. Span je vierkantjes op op de volgende maaten:
- Color Crafter – 25cm
- Stone Washed – 22cm
- Sunkissed – 20cm
Mijn vierkantjes waren nogal flink aan het bobbelen en opspannen is echt nodig.
Video tutorials
If you appreciate a visual support to the pattern, you can follow the video for Rachel. This video shows you how to make the original square.
After you have completed the original pattern you need to add an extra round using Color A to bring your total stitch count to 44 stitches. I also show you how to do this in a short video.
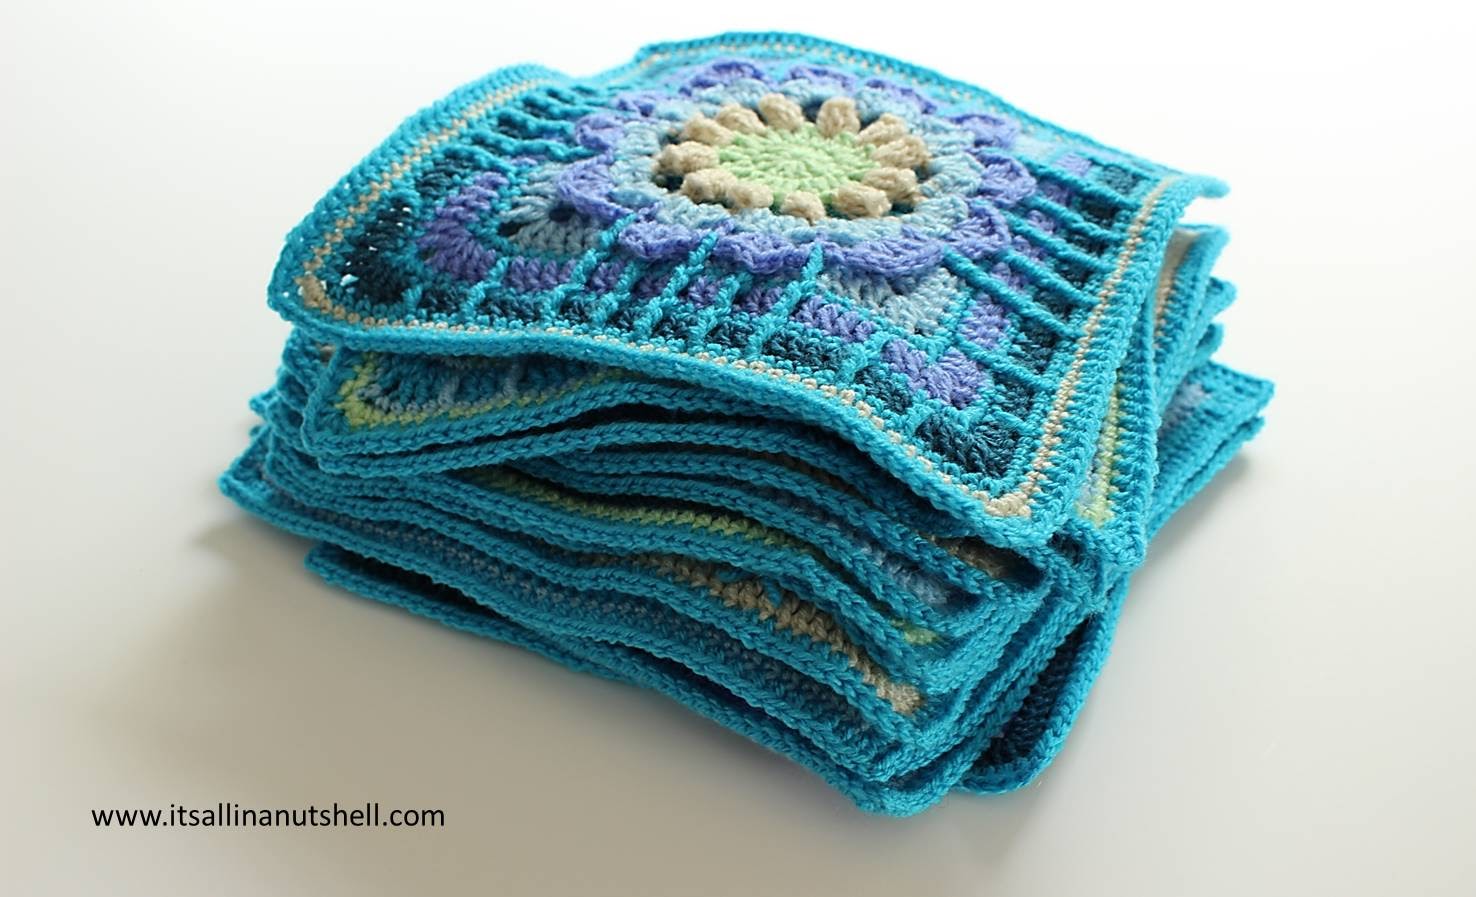
Share your squares
When you have completed your 3 squares and have added the extra row you are all done for this week. WOW! 15 squares already!! My stack of squares is a lovely stack indeed. If you would like to share your work you can do so in the Official CCC Social Group on Facebook, share it on my Facebook page or tag me in your post on Instagram. If you use the hastag #NutsAboutSquares it will help me find it.
I hope to see all of you next week for part 6 of Nuts about Squares CAL.
With love,
Esther
This post contains affiliate links. Please read my disclosure and copyright policy. All opinions are my own and I only link to products I use or would use. Thank you for using the links on my blog and supporting my work.
Copyright (c) 2014-2026 It’s all in a Nutshell Creations. All rights reserved.
Discover more from It's all in a Nutshell Crochet
Subscribe to get the latest posts sent to your email.
Under resources you find all relevant links and information.
If you don’t like the project then don’t make it.
Sorry but here it says 3 squares but on the Nuts about aquares week 5 you say make 5 squares. Which is correct?
that is a small mistake in the video, I meant week 5, not make 5 🙂
you should make 3 squares
Already done, just ask to be sure…
Hi Esther!!! I have a question, how come that the ch3`s before and after the petals (Earth Rachel square) look like they are caught somehow. But then on the video they look like they are loose. I really like the look that on the picture on this blog…How can i accomplish that?
During testing some of the squares I worked with a ftdtr in stead of a fptr in round 11 (?) and caught the space between the petals. However, this pulled the square inward and we decided not to give it as a tip for the final pattern. If you want to you are welcome to work it like this also.
I am loving these challenging squares! I appreciate being able to make three of each, as it means I’m finally comfortable with the pattern for each by the third of the repeated square. 😉 I did find a discrepancy between the written and video instructions for Round 10 of Week 5. The video is correct, so thank goodness for the video! In the written instructions, after the 5 (2 DC, ch 1) between each of the tr of Round 9, it says to, “dc in next 2 sc, ch 1, sk 1 sc, dc in next 2 sc.” If you ch1, sk 1 in between the DCs in that portion of the directions it isn’t symmetrical with the other end of that pattern. The video points this out.
wonderful to hear that you are doing great 😀