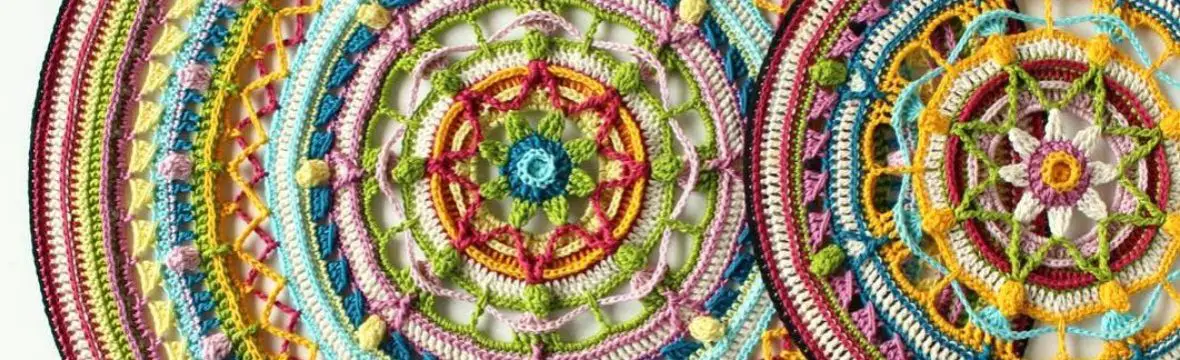

We have come to that fabulous moment in any project, the moment when you can step back and look at what you have made. We are making the border around our Nuts about Squares blanket as a finishing touch to a project I really enjoyed making. The border has been designed especially for Nuts about Squares by the very talented Tatsiana from LillaBjorn Crochet.

Resources and useful links
- Add Nuts About Squares CAL to your Ravelry queue
- Nuts about Squares CAL Information
- Written Zig-Zag border pattern (US Terms) on the designer’s blog
- *** Video Tutorial *** for border
- Tips for Nuts about Squares part 15 in this post
- All Nuts about Squares video tutorials in one YouTube playlist
- Color chart Week 15 (border) showing the color placement
NEDERLANDS / Dutch
- Nederlands geschreven patroon voor de rand
- Tips voor Nuts about Squares deel 15 in deze post
- Kleurkaat Week 15 (rand) met de kleurverdeling per toer
Yarn kits
The 3 colorways Nuts about the Earth, Nuts about the Sea, and Nuts about the Sky are available as kits. You can use one of the suggested kits/colorways, or you can use your own colors and yarn.
I have kits available for all three Nuts About Squares Colorways in my SHOP HERE. Choose between Nuts About Squares – EARTH in Scheepjes Stone Washed, Nuts About Squares – SEA in Scheepjes Colour Crafter, and Nuts About Squares – SKY in Scheepjes Sunkissed.
I have a detailed post with all the yarn information, amounts, weights and color combinations for the 3 colorways, you can find the yarn/color information HERE.
Color chart
The colors for each row are given in the Color Chart Week 15 for each of the three colorways or you can follow the general colorway in the table below.
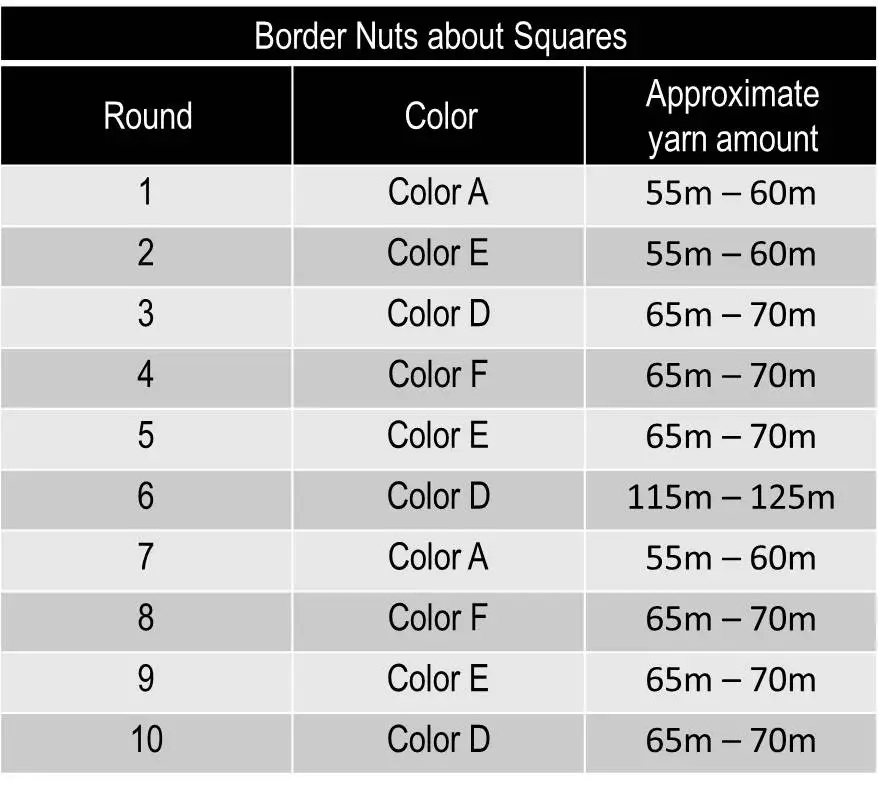
The yarn amounts are given per round so you can estimate if you have enough yarn of a certain color to make that round. You should have ample color B left from your kit to use as a backup color.
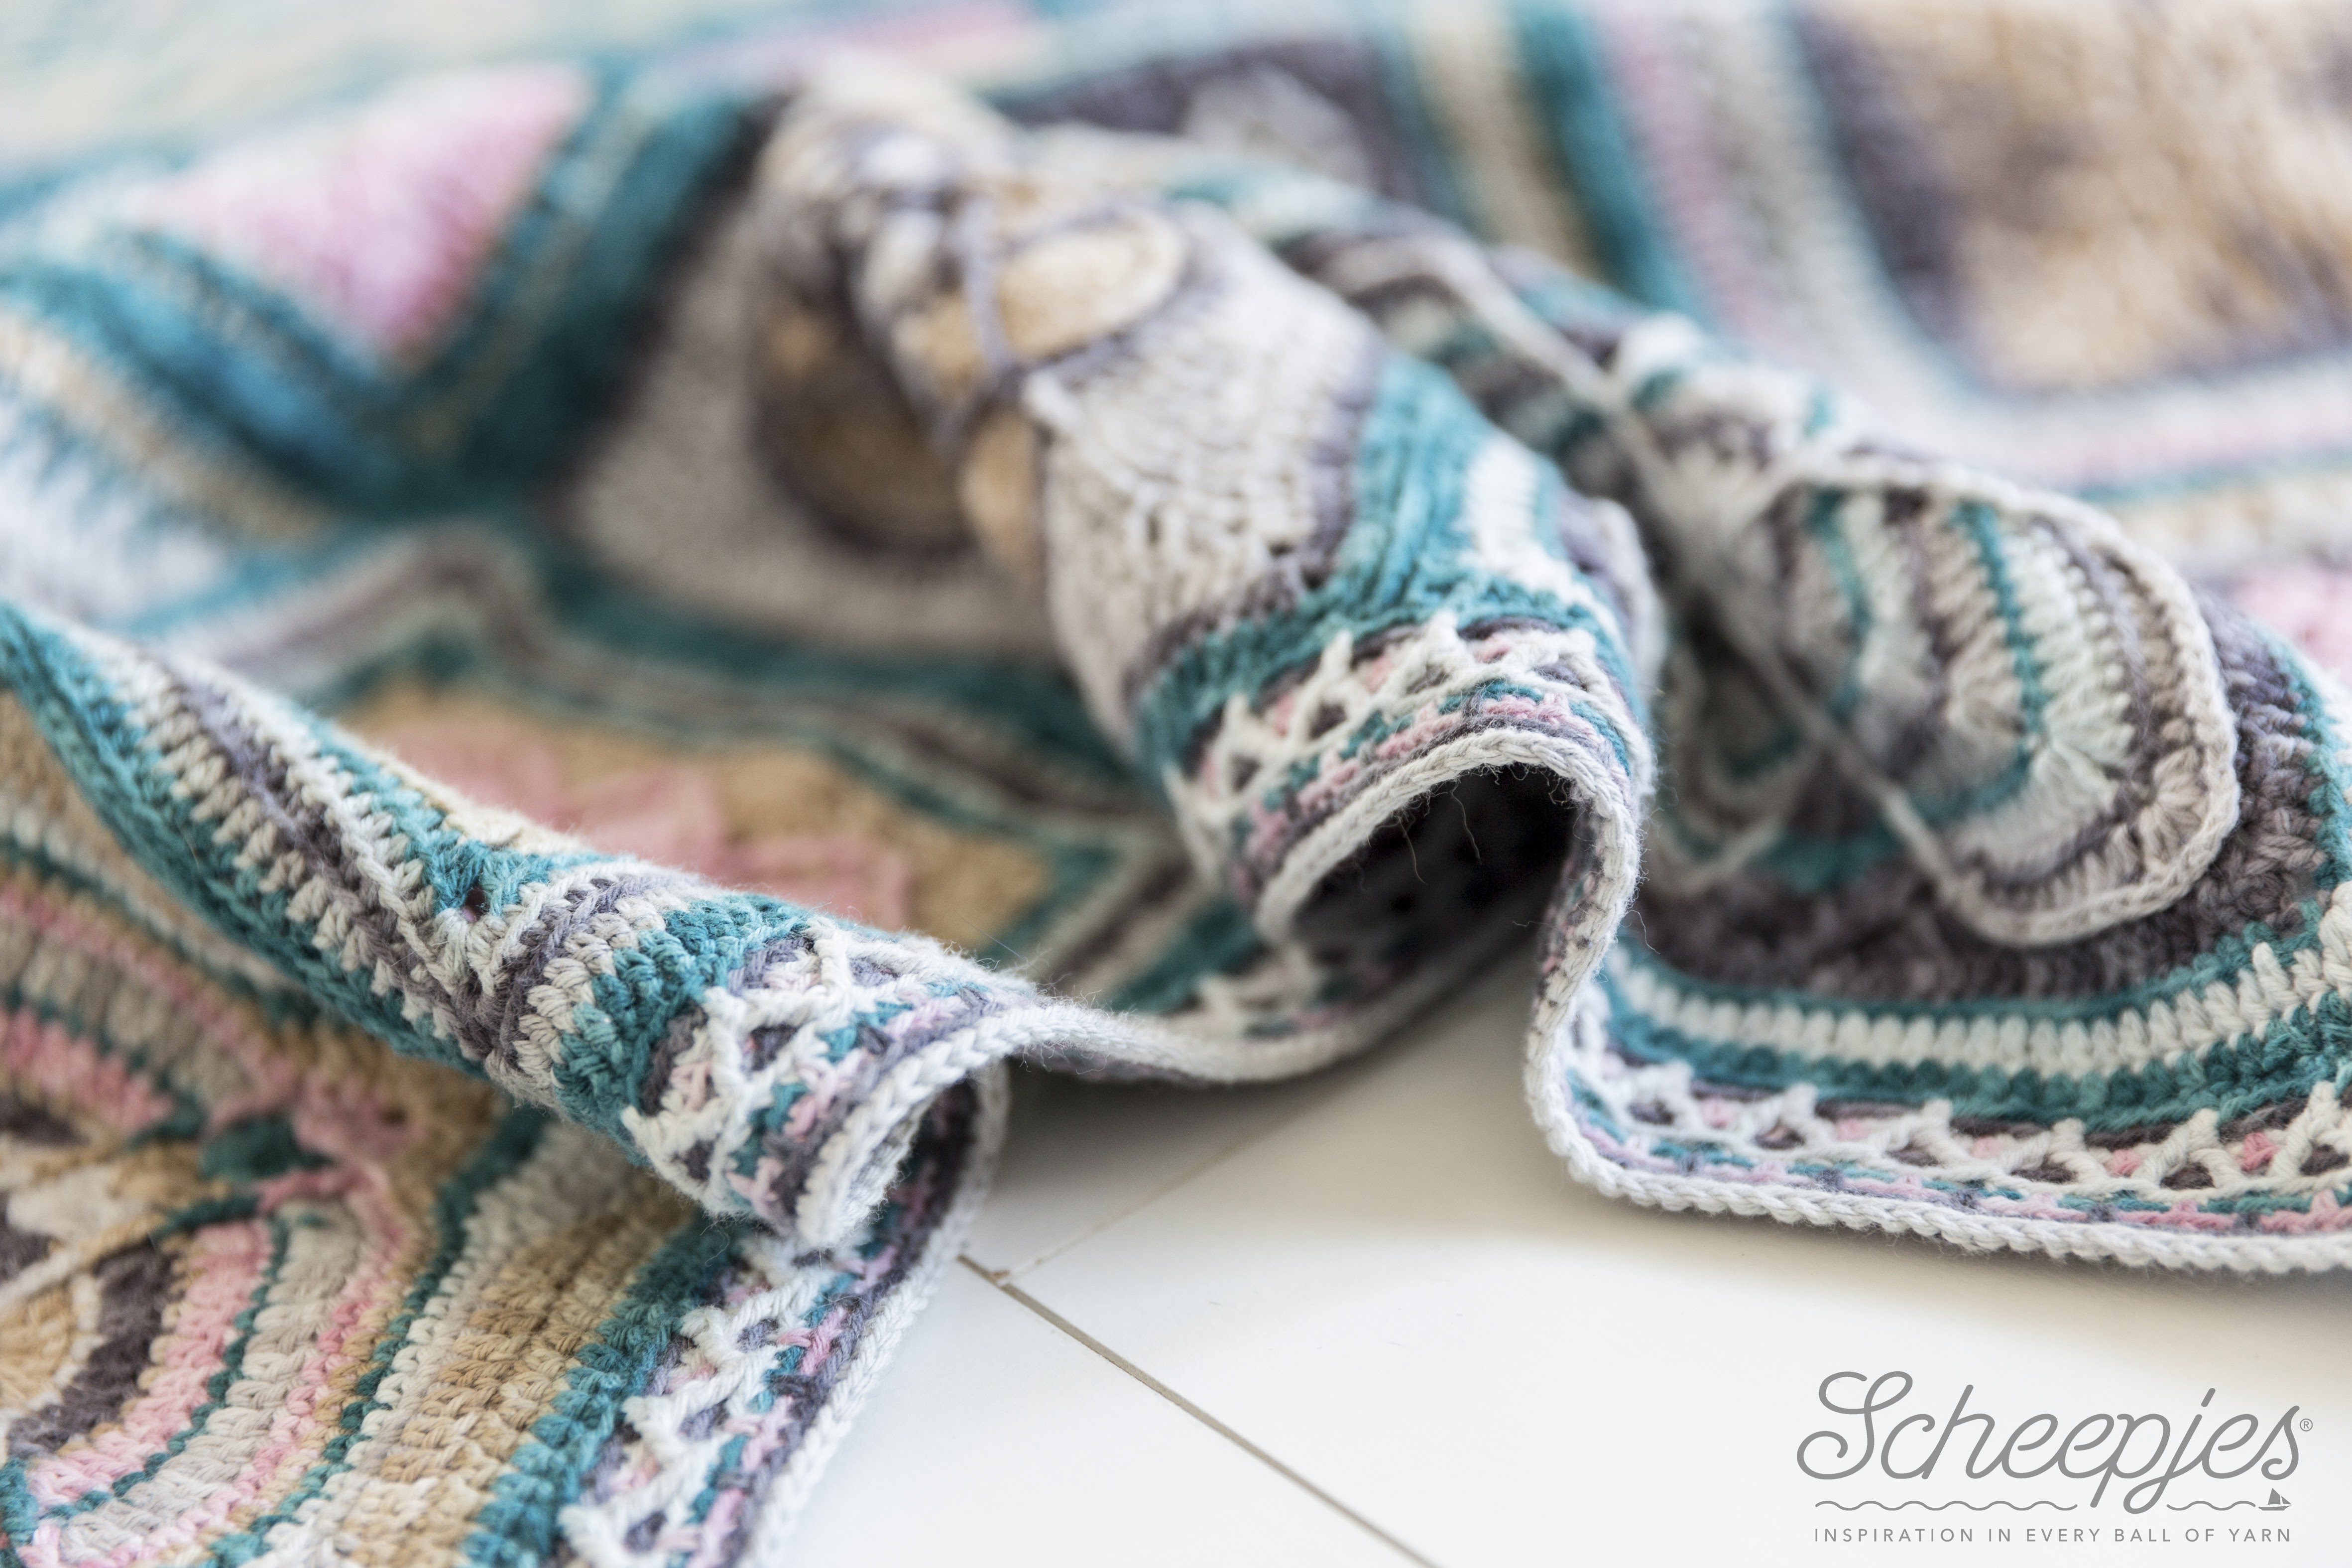
Feel free to alternate and change your color placement for the border to best match the yarn colors you still have available. The border looks best if Round 3 and Round 6 are in the same color.
Instructions Nuts about Squares week 15
Use the following hook sizes to make make your border, or the hook size that you have been using the most during the project:
- Color Crafter – 4.0mm
- Stone Washed – 3.5mm
- Sunkissed – 3.0mm
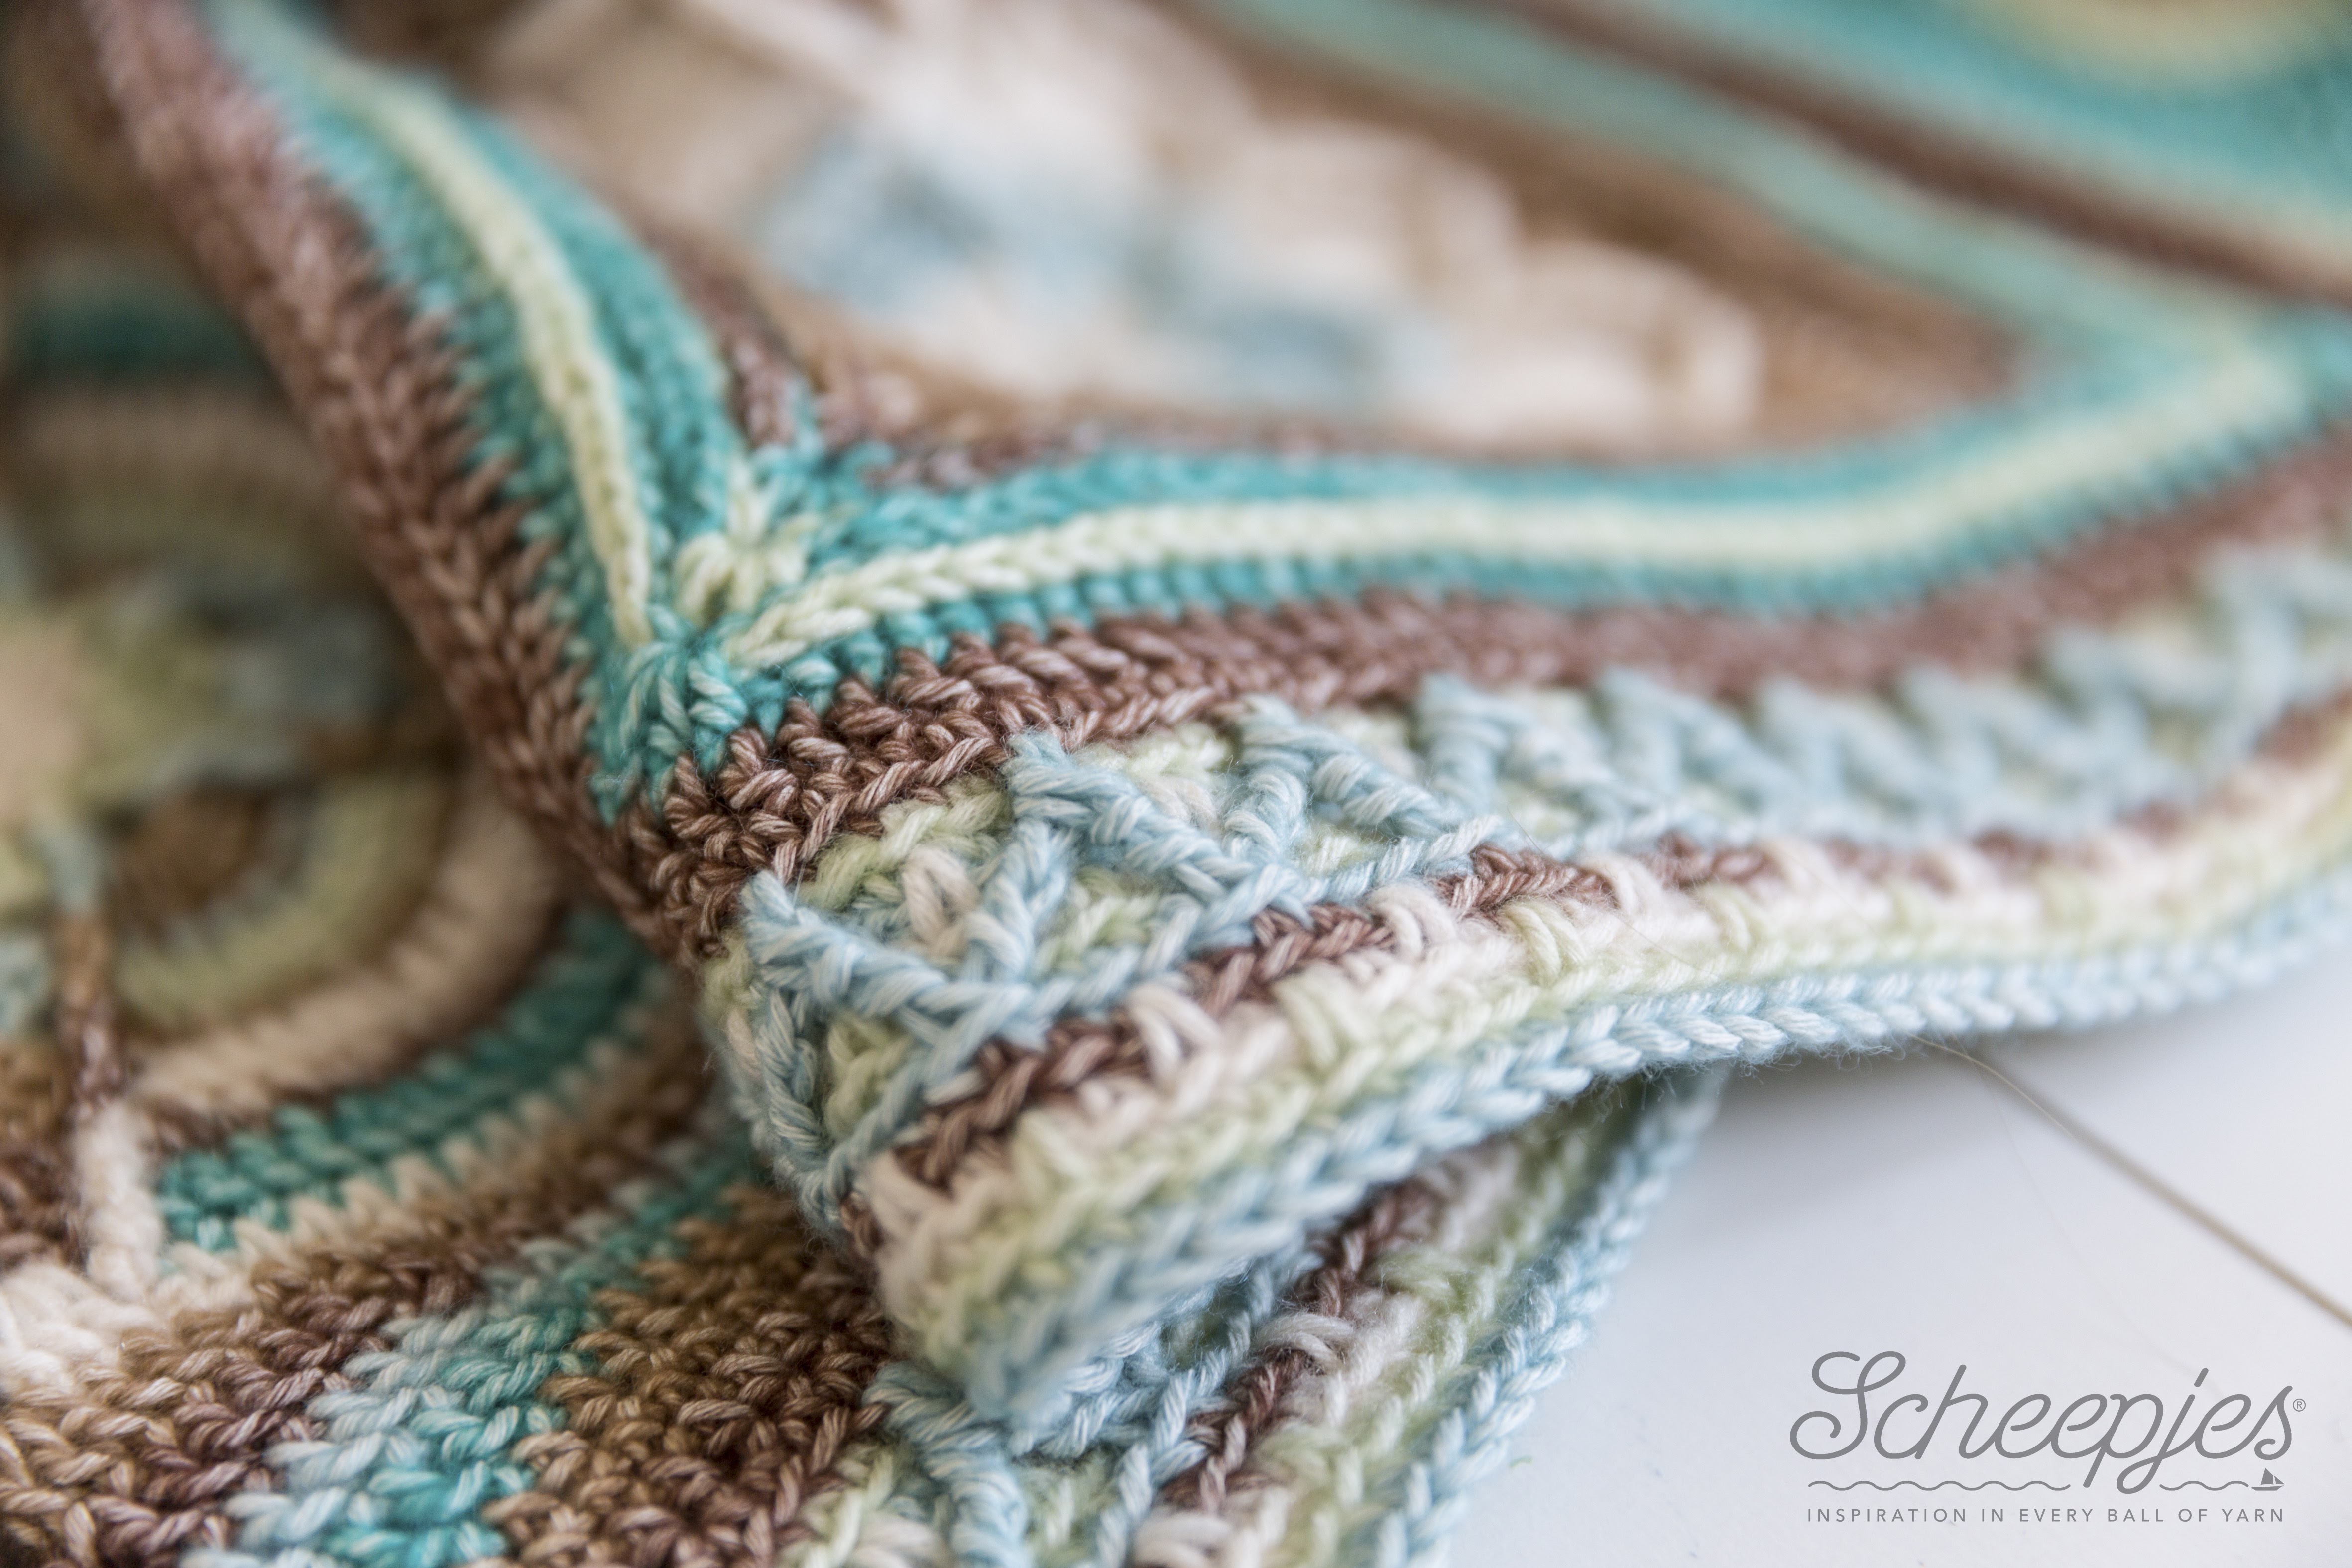
Work Rounds 1 to 10 of the border according to the written pattern or video tutorial using the colorway given above. Work away your yarn tails and block your blanket for the best final finish.
If you have a different number of squares than the 5×7 squares used for Nuts about Squares, you will have to adapt your stitch count to get the border to work. At the end of Round 1 you need (multiple of 4 plus 1) stitches on all sides of your blanket. For example for Nuts about squares you have 4×83+1=333 stitches on the long side and 4×59+1=237 stitches on the short side after Round 1. Adapt your stitch count for Round 1 by adding extra stitches in the joins or corners as needed.
Nederlandse Instructies (Dutch) voor Nuts about Squares week 15
Gebruik de volgende maat haaknaald om de rand te maken, of de maat haaknaald dat je het meest hebt gebruikt tijdens het project:
- Color Crafter – 4.0mm
- Stone Washed – 3.5mm
- Sunkissed – 3.0mm
Werk Toer 1 tot 10 volgens het geschreven patroon voor de rand of gebruik de Engelstalige instructievideo met de kleurverdeling voor de rand. Werk al je draadjes weg en span je deken op voor het beste resultaat.
Mocht je een andere hoeveelheid vierkantjes hebben dan 5×7 zoals in Nuts about Squares moet je je eerste toer aanpassen om te zorgen dat de patroon voor de rand werkt voor jouw deken. Aan het eind van Toer 1 moet je (een veelvoud van 4 plus 1) steek hebben aan elke kant van je deken. Als voorbeeld voor Nuts about Squares: de lange kant heeft 4×83+1=333 steken en de korte kant heeft 4×59+1=237 steken. Pas Toer 1 aan door extra steken toe te voegen in de hoek of hechtingen van de vierkantjes om bij een juiste stekenaantal te komen.
Video tutorials
If you appreciate a visual support to the pattern, you can follow the video for the border which shows you how to make each round.
Share your finished blanket
You should be incredibly proud of yourself. Nuts about Squares is a challenging project and you did it! You took on the challenge and you made a fabulous blanket. I would love to see your beautiful creation. If you would like to share your work you can do so in the Official CCC Social Group on Facebook, share it on my Facebook page or tag me in your post on Instagram. If you use the hastag #NutsAboutSquares it will help me find it.

Possibly you have some leftover yarn….? Next week I will share a bonus pattern to use up all your leftovers.
With love,
Esther
Follow me on
Facebook, YouTube, Ravelry, Instagram
This post contains affiliate links. Please read my disclosure and copyright policy. All opinions are my own and I only link to products I use or would use. Thank you for using the links on my blog and supporting my work.
Copyright (c) 2014-2025 It’s all in a Nutshell Creations. All rights reserved.
Discover more from It's all in a Nutshell Crochet
Subscribe to get the latest posts sent to your email.
The website for the written pattern says it is not found?
the link is now updated, should work
Esther,
Thank you for this. I can’t get the link to the pattern to work though – says blog page doesn’t exist.
Regards
Jenny
>
This is the link to the pattern, should work, it does for me 🙂 : http://www.lillabjorncrochet.com/2017/07/nuts-about-squares-cal-border.html
I was eagerly waiting for this today, and I am in no way disappointed! What a beautiful border! I have to tell you, Esther, this is the biggest project I have made. Since I have only been crocheting a few months this seemed like it would be daunting, but it wasn’t. It was my travel project since I fly many times a month. When my dad passed away near the end of the project it became my quiet time therapy project. I am so blessed by you and your efforts on this. Thanks for making this one of the better things I have ever worked on. It has turned out to be beautiful, and the sample one you made – OMG! It is stunning! It’s been a wonderful journey…..
Thank you so much, i am very happy to hear that this project meant so much to you.?
thank you Esther!
Reblogged this on Life on the Front Range and commented:
Just about finished with mine. Thank you for your inspiration and all of your hard work. Looking forward to your next project.
Thank you so much for your video tutorials, Esther. I have enjoyed the project so much, and couldn’t have done it without them. I have a problem getting the correct number of stitches to start the border,though. Are the corner single crochets included when counting the number of stitches for the sides?
Yes, the corner stitches are included in the count. If all else fails, just continue and fudge and extra stitch in a next round when you have too little or too few.
Thank you.
Thank you, thank you, thank you! I have enjoyed this Cal more than I can ever tell you. So much that I am going to do Nuts About Earth as well. Not only was this project magnificent in its beauty, but your attention to detail, your fabulous videos…I could go on and on! I have only praise for each and every detail. You are amazing, encouraging and calm in your instructions. I will happily follow you through ANY project in which you are involved. By the way, I started my Nuts About the Sea with the “substitute” Barneveld but when Zandvoort became available, I ordered it. I loved the color so much, I re-did the squares I’d already completed and then continued the remainder of the project using Barneveld. The colors are gorgeous. Perfect. Thanks again! Best regards, always!
Tawana (USA)
Thank you so much for your positive words
Esther, first let me thank you for this incredible CAL. I have been crocheting for many, many years and have never enjoyed a project so much. Your organization of the entire CAL as well as your clear, concise directions and soothing voice has spoiled me for anything else! I truly hope your gracious efforts pay off for you and all those involved.
Now, I have a question. I chose the “Sky” version and have really enjoyed working with the lighter weight yarn. (I may never go back to worsted weight!) I have just begun my border and have completed Round 1. I have only 5 grams of the Oceanside color left. Do you happen to know if that will get me through Rd 7 when I need it again? I really want to use that color and may go looking for a seller in those who have some left over! LOL
Thank you!
Wonderful that you enjoyed the CAL so much ?
Regarding your question, 5grams of the Sunkissed is about 17meters, which unfortunately is not enough for round 7. Tension is different for each person and I believe you’re is such that you used a bit more than my testers, but only a bit. Unfortunately it comes down to the same thing, you dont have enough yarn. You can use a different color for your kit of you want to. To help with estimating if you have enough yarn of a particular color, check the yarn amounts I give in the tabel in this post. And if all else fails, you might need to consider buying an extra ball ?
Thank you Esther…that’s what I was afraid of, but I appreciate your response. I just posted in the community too, but edited it with your response. Let’s see if anyone has any left they will part with before I buy a whole new ball. 🙂
Hallo Esther,
Dank je wel voor dit mooie project en de geweldige video”s met de duidelijke uitleg van deze CAL. Voordat ik aan dit project begon, kon ik alleen maar stokjes, dubbelstokjes en vasten haken. Ik heb zoveel bijgeleerd aan nieuwe steken. En ja, het was heel leuk en mooi om via deze CAL zoveel nieuwe steken te leren kennen. En ik ben nog verbaasd dat het me gelukt is om alle granny-squares van de CAL te maken… Dank-je-wel!!! Ik kijk uit naar de nieuwe projecten die je gaat maken!!!
Ik ben nu bezig met de rand en het is me niet helemaal duidelijk wat te doen in toer 6. Bovenaan in de tekst onder de video wordt aangegeven dat de hoeksteken driedubbele stokjes moeten zijn. Is het de bedoeling dat met het samenhaken van de eerste steek en laatste steek van elke kant, dat de hoeksteek driedubbel stokje is en dat je die samenhaakt met een dubbelstokje? Krijg je dan geen ongelijke steek? En dat je vervolgens twee dubbele stokjes steeds samenhaakt, zodra je de eerste “zigzagsteek”/ reliëfsteek van toer 6 hebt gemaakt? Begrijp ik het zo goed?
Hoor het graag.
groetjes,
Bo
Euh, nee, ik begrijp niet helemaal wat he bedoelt.
Ik heb die lange steek 1x te weinig de draad omgeslagen. Maar als je precies doet wat ik in de video doe dan is het ook prima. Want de steken zijn toch een beetje elastisch.
Ik bedoelde dat de eerste en laatste reliëfsteek van elke zijde net iest anders zijn> dat die steken iets langer zijn. Begrijp nu dat de video-uitleg van jou over deze toer ook goed is. Ik kijk uit naar je nieuwe projecten!! Dit project was zo leuk om te doen en ik heb zoveel bijgeleerd. groetjes, Bo
Hi. First I would like to thank you for this beautiful blanket and especially about the videos.
Please could you be so kind to help me I am doing a 8 by 5 squares. I am trying to apply you formula but I don’t know where you get “83” or “59”.
Thank you so much
Rosa
I will get back to you one this, i am away for a few days now